Webex Transcription: Step-by-Step Guide
Everything you need to know about Webex transcription. After reading this, nothing will slip through the cracks in your virtual meetings.

The data tells us that Cisco Webex has 39 million cloud calling users and 650 million monthly meeting participants, with 200 million of the latter being monthly active users. The significance? So many users, so many meetings, so many minutes. However, the reality is that most of these meetings are not being transcribed efficiently.
If you have landed here with the sole intention of learning how to transcribe Webex meetings, you are in the right place. We will uncover multiple methods for Webex transcription, including methods that solve issues within Webex’s own transcription features. Let’s get started.
Does Webex have Transcription?
In short, the answer is yes. Webex supports transcription for Webex Meetings, Webinars, and Events. However, that’s not the full story. Webex’s transcription capabilities are limited to just the English language, and the host of the meeting is the person with all of the power.
To elaborate, the host has the ability to receive a transcript after the session, which is generated from the recorded audio (recording a Webex meeting is a manual task that requires being switched on).
The transcription is usually available in a time frame that’s about twice the length of the meeting. However, in some cases, especially with longer meetings or high demand on the service, the transcription process might take up to 24 hours.
Personally, I find the host-restricted transcription service exactly that - restrictive - both to individuals and the progression of teams. This has led me to find alternative methods, because even though the accuracy of Webex transcriptions is generally dependable (with exceptions being caused by unclear audio), I believe every attendee needs a transcription feature at the tip of their finger.
How to Transcribe Webex Meetings
Bubbles is your first option for Webex transcription. We are bringing this option to you as Bubbles is free, accurate, and extremely precise. Bubbles is also non-restrictive in who is able to transcribe Webex meetings, and has the ability to transcribe in many languages. For more specific information, here is a full list of languages that Bubbles can transcribe a Webex meeting in.
Make your
meetings matter
Loved and trusted by 100,000+ users:
- Automatically Record and Transcribe Meetings
- Extremely Accurate Notes, Summaries, and Action Items powered by AI
- Works with Zoom, Google Meet, and Microsoft Teams
- Save time and follow-up with quick async videos
Simply connect your work Google or Microsoft Calendar to get started.

We have been extensive in our research when it comes to great Webex transcription, and if you want to be too, you should watch this user review of Bubbles on YouTube.
We want to provide you with a quick step-by-step guide for setting up Bubbles with your Webex account now. Here it is:
Step 1: Sign Up for Bubbles
Head over to the Bubbles app and create a free account. This gives you access to transcription and note taking features for your meetings.
During sign-up, you'll create a Bubbles workspace, typically your company or team name. You will also be asked to add a work calendar. Go ahead and connect your calendar, allowing Bubbles to sync with your upcoming Webex meetings. This will enable Bubbles to automatically join and transcribe your conversations without you having to push another button.
You can also install the Bubbles Chrome/Edge extension from the Chrome or Edge Web Store to get started quickly.
Step 2: Schedule Your Webex Meeting
Schedule your Webex meeting as usual.
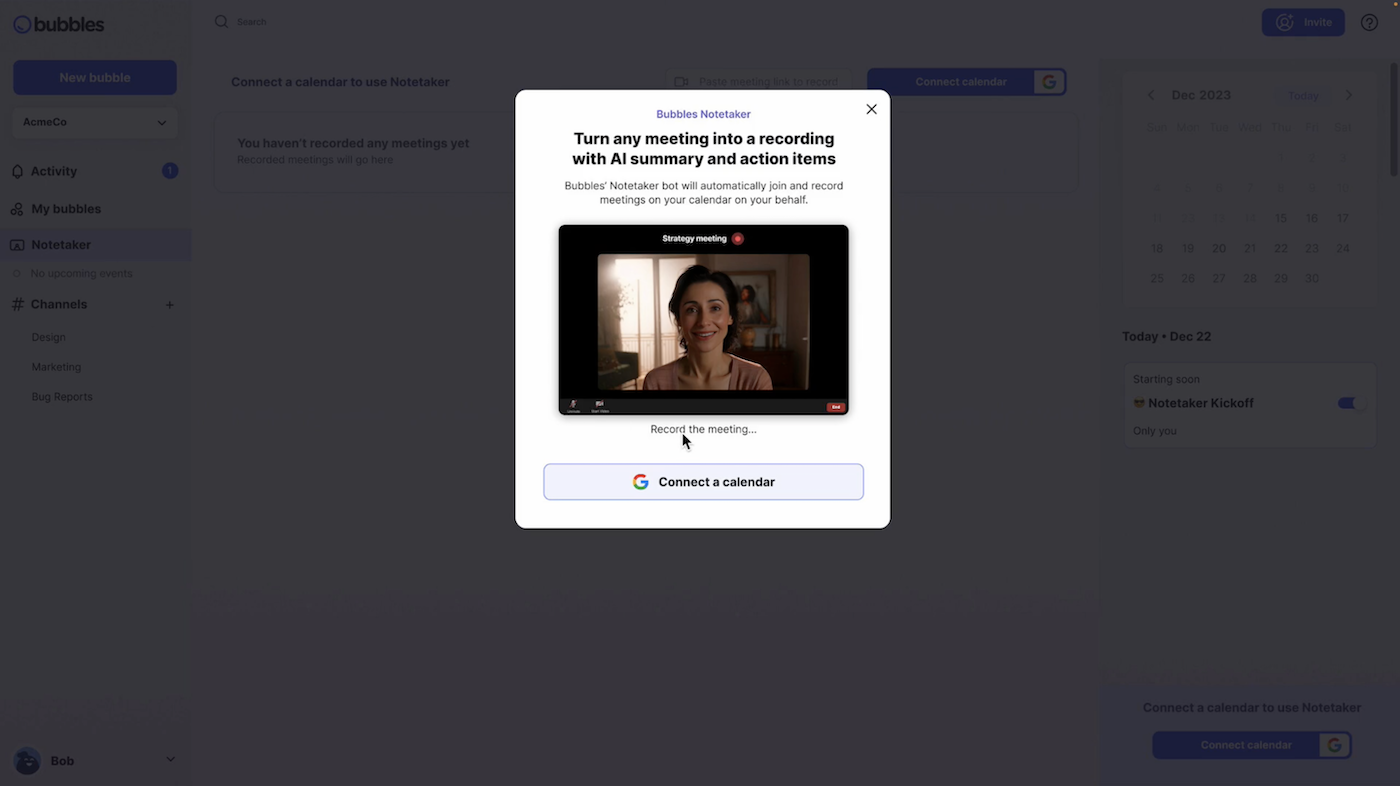
Since your calendar is connected, your upcoming Webex meeting will appear in the Notetaker section within Bubbles. This is on the right side of the Notetaker area, and will look like this:

Alternatively, you can paste your Webex meeting link directly into the “Paste meeting link to record” section at the top of the Notetaker area.
Step 3: Start Your Webex Meeting
Begin your Webex meeting as you normally would. You can either join the meeting through the Webex website or app, or through your Bubbles Notetaker area (as shown in step 2).
Regardless of how you join, Bubbles will automatically join the meeting, record, and transcribe the conversation. You will need to let your Notetaker into the meeting on arrival, but once you do this, transcription will be fully underway and being taken care of for you. This allows you to focus on the discussion without worrying about taking notes.
During the meeting, Bubbles Notetaker will notify all participants of its role in the Webex meeting chat.
For additional features like removing Bubbles branding and messages from the chat during the meeting, or gaining unlimited recording length, you can upgrade to Teams Pro for as little as $8.
Step 4: Access the Transcription
After the Webex meeting concludes, Bubbles will process the recording and send you a follow-up email. This email contains a link to a “bubble” where your Webex meeting recording and transcription are stored. The transcription is presented clearly alongside the recording, making it easy to review, edit, and share. Check this example out for how you can expect your Webex transcription to look:
You can either access this transcription through the aforementioned email, or alternatively, you can find it yourself within the Notetaker workspace you created during step 1.
The transcription will be completed and available within minutes, or even seconds for super quick ad hoc meetings.
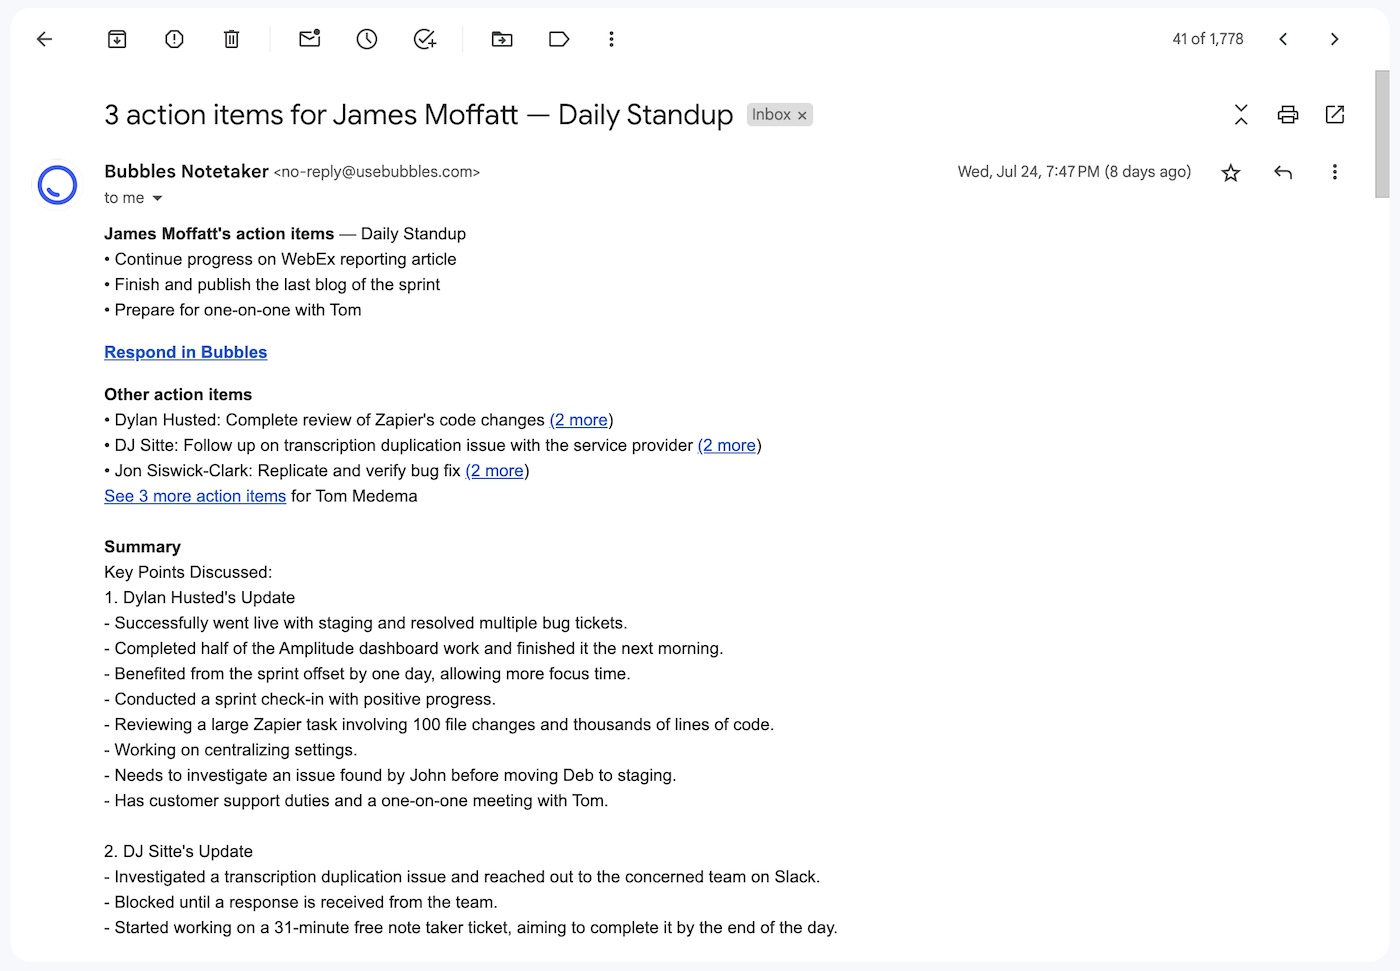
The follow-up email that Bubbles sends can be a great way to quickly recap the meeting, as this email does not just contain the link to the bubble. In fact, it also contains a pretty extensive summary of what was discussed in the Webex meeting, as well as personalized action items and next steps. Here is an example:
How to Transcribe a Webex Recording
If you want to transcribe a pre-existing Webex meeting recording, you can also do this through Bubbles. In addition to real-time transcription, Bubbles will transcribe a recording through this method:
Step 1: Upload the Recording
Log into your Bubbles account and start a new bubble recording session.
Step 2: Select the File
Upload the Webex recording file from your device. This will allow Bubbles to process the meeting and generate an accurate transcription. You can easily drag and drop the file into the Bubbles interface.
Step 3: Process the Transcription
Bubbles will quickly process the recording and create a complete transcription.
Step 4: Access the Transcription
Find the transcription in your “My bubbles” section. You can name the bubble to match the content of the recorded meeting, making it easier to locate and review later.
This step-by-step guide is for those who have not been able to receive an appropriate transcription from their recording. For example, if you want to transcribe a recording that was done via Webex’s own system in another language (such as Spanish), you can combine your recording with Bubbles to achieve this.
Webex Transcription Service Guide
Overview: Webex provides automatic transcription for recorded meetings, webinars, and events. This feature is available by default but can be managed by administrators or individual hosts.
Key Points:
- Activation: Administrators can enable transcription for all or specific hosts via Webex Site Administration or Control Hub.
- Language Support: Currently, only English audio is supported.
- Availability: Transcriptions are generated within twice the meeting's duration. Once ready, they appear at the side of your recording. This is deemed to be a long turnaround time in the world of meeting transcription.
- Lack of Automation: Webex meetings must be recorded in order to transcribe it, which is a manual process.
Cost: Transcription is generally included in Webex plans that offer recording features.
Step-by-Step Guide to Enable Transcription in Webex
Before anything, Webex transcription must be turned on for your account. If you do not have the transcript service turned on, you must contact your Webex Administrator. Alternatively, use Bubbles yourself, and take control of your own Webex transcription.
Once turned on, the transcription will be generated automatically alongside the recording (MP4 format). In turn, the transcription will be visible while you play your recording back.
Existing Users
- Sign in to Webex Site Administration.
- In settings, head to User Management and then click on Edit User.
- Find the user who you want to turn transcription on for. Once found, click on their Name.
- In the General section within Privileges, enable the option to create recording transcripts for all MP4 recordings associated with this user.
New Users
You can enable transcripts for new users during account creation too. Here's how you can do this:
- Navigate to User Management.
- Click Add User.
- Go to Privileges and click on the General subsection.
- Select the option to create recording transcripts for all of the new user’s MP4 recordings.
After the meeting, access and download the recording from your Webex site in Modern View.
Conclusion
It is clear that Webex’s built-in transcription feature is a convenient option for basic needs, but it does have its drawbacks. Both pre and post-meeting, you are going to be met with unnecessary complications and lengthy processes that you are not fully in control of. Not only this, but it’s limited to English.
It is also clear that as a Webex user, you have better options at your fingertips. Using a tool like Bubbles is an excellent alternative. Integrating smoothly with Webex, Bubbles will give precise transcripts almost every time, and in more languages than I can be bothered to write down! Bubbles is also your home of post-meeting collaboration, with async communication channels and organized workspaces.
Bubbles is free to try today, so get started and enjoy a richer, more versatile transcription tool.
Collaborate better with your team
Get your point across using screen, video, and audio messages. Bubbles is free, and offers unlimited recordings with a click of a button.
.png)


Collaborate better with your team
Get your point across using screen, video, and audio messages. Bubbles is free, and offers unlimited recordings with a click of a button.