How to Transcribe Meeting Minutes (4 Step Guide)
Great meeting minutes are key for clarity and accountability. If your team struggles with capturing and organizing discussions, this article is for you. Learn how to transcribe your meeting minutes efficiently, and ensure every detail is recorded, keeping you on track.

Work from home trends are rife, and whether you like that or not, there are plenty of reports that claim the “digital intensity” of workers’ days has increased significantly as a result. This is clear and comes hand-in-hand with the boost in tech usage. Something that is perhaps less clear though, is that work from home can make certain tasks harder to get done. Intensity doesn’t have to equal difficulty, and for a lot of tasks (like transcribing meeting minutes), people are making this harder than it needs to be.
You are truly lucky if you haven’t had to sit through an hour-long operations meeting with the sole purpose of scribbling down the meeting minutes. Not only is this insanely boring, but it is also an archaic way of leading meetings. Anyway, with our guide here, we are going to show you how to ensure you or any of your colleagues never need to do this again, by using accurate transcription.
Benefit of Transcribing Meeting Minutes
Accurate meeting minutes are essential for capturing key points, action items, and decisions. Not only this, but you will also save your whole team time by keeping on top of meeting minutes, especially in the meeting recap process. Equally, you will also stop or reduce any confusion around meeting discussions by keeping it clear. That applies to the meeting itself, where people will be able to focus their attention fully on the conversation, and also to post-meeting.
However, manual transcription of what gets decided and said in your meetings can be time-consuming and prone to errors. With that in mind, we want to show you a more modernized technique that can help you simplify this process and become a meeting minutes wiz in minutes. This is simple, and comes in a 4 stage guide. Let’s get into it.
How to Transcribe Meeting Minutes
Step 1: Choose Your Preferred Software
Whether you opt for Zoom, Teams or Webex, I’ve got you covered. We are going to combine your virtual meeting software of choice with meeting recording and transcription software. Our choice for recording and transcription is Bubbles, as it is compatible with all of the major meeting software, and offers highly accurate transcription services, even on the free plan.
To get started, visit Bubbles and create an account. By doing so, you will gain access to state of the art meeting transcription and notetaking powers. With Bubbles, you are able to start for free and test out their meeting transcription feature with no strings attached, so I would recommend kicking-off with this.
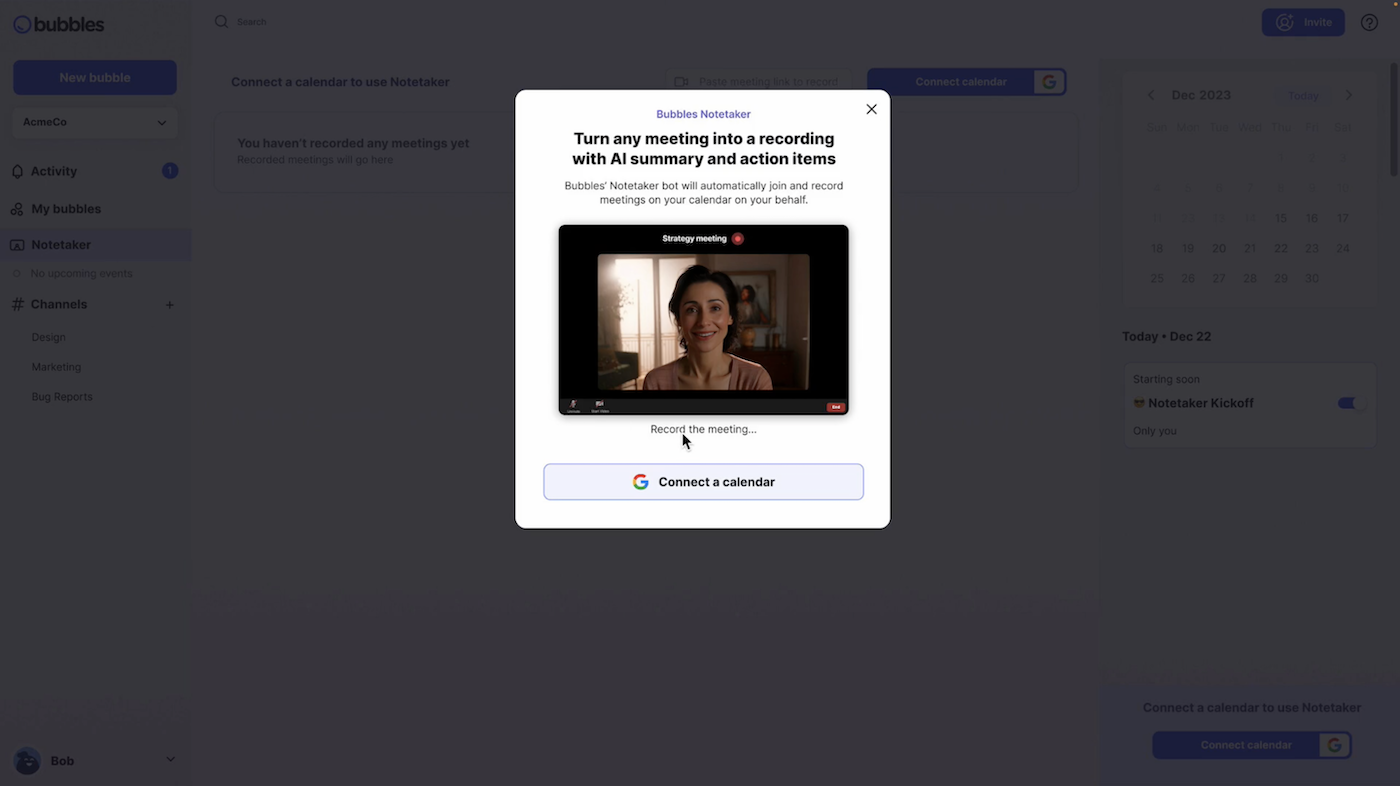
When signing up, you are required to create your own Bubbles workspace. This is a personalization step where you can choose the name of the area where you want to store your meeting minutes transcriptions. You are also required to connect your calendar, so that Bubbles can sync with your upcoming meetings and be ready to join and transcribe them for you automatically. This is how that looks when signing up:
Make your
meetings matter
Loved and trusted by 100,000+ users:
- Automatically Record and Transcribe Meetings
- Extremely Accurate Notes, Summaries, and Action Items powered by AI
- Works with Zoom, Google Meet, and Microsoft Teams
- Save time and follow-up with quick async videos
Simply connect your work Google or Microsoft Calendar to get started.

Step 2: Schedule a Meeting Normally
If you haven’t already, go ahead and schedule your next meeting. Bubbles will be connected to the calendar, so you don’t need to do anything more at this stage to have your meeting minutes automatically transcribed for you.
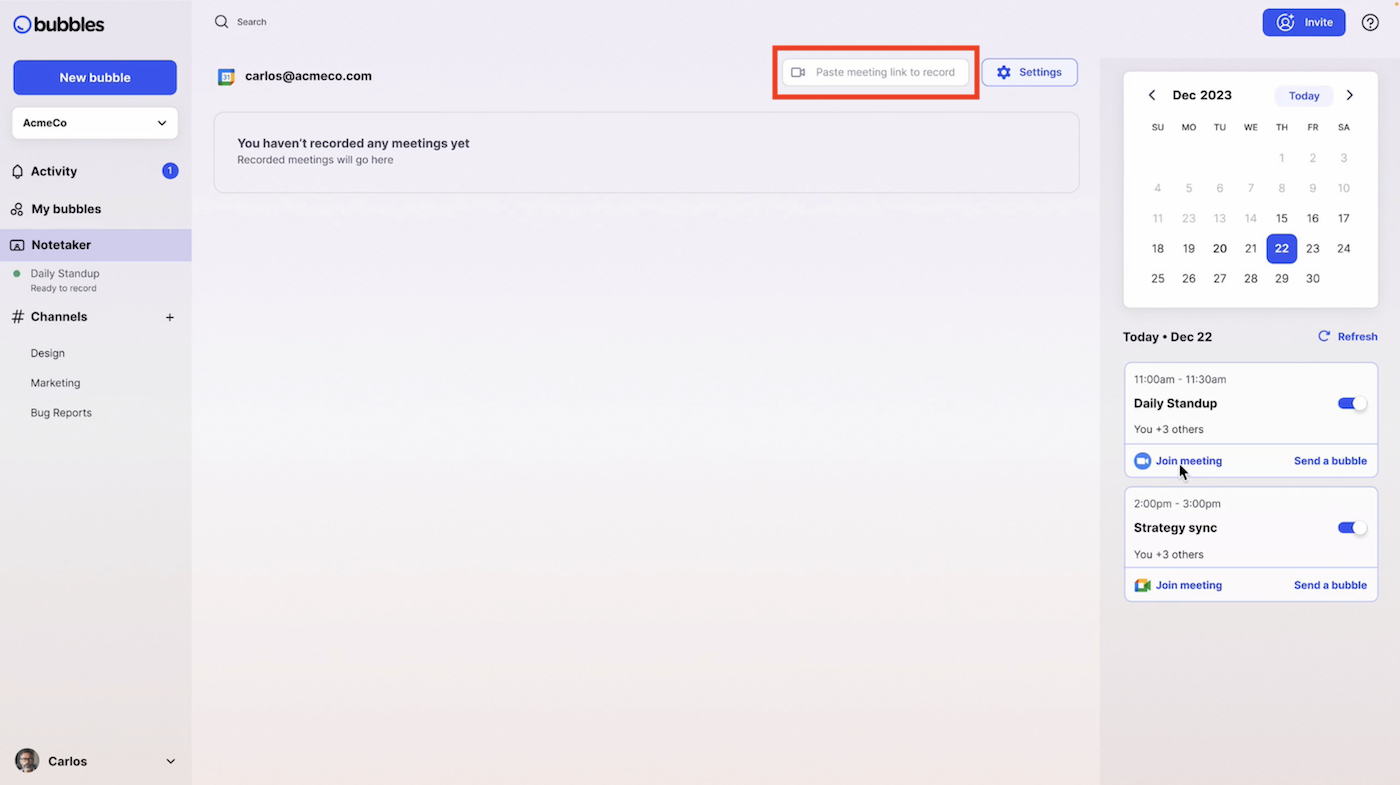
For the sake of providing an example, we are going to show you how Bubbles works when transcribing the meeting minutes of a Zoom meeting. However, the process is the same regardless of the online meeting software that you prefer. If you do not want to connect your calendar initially, you are also able to paste the meeting link into your Bubbles Notetaker area (as highlighted in red below), and Bubbles will only join that specific meeting.
Step 3: Begin Your Meeting
Launch your meeting on Zoom, Google Meet, Microsoft Teams, or any other platform you use. Again, we will show how this looks in Zoom below. Once the meeting starts, Bubbles will automatically join, record, and begin to transcribe your entire meeting, turning it into clear meeting minutes instantaneously, which are distributed to you after the meeting in a follow-up email.
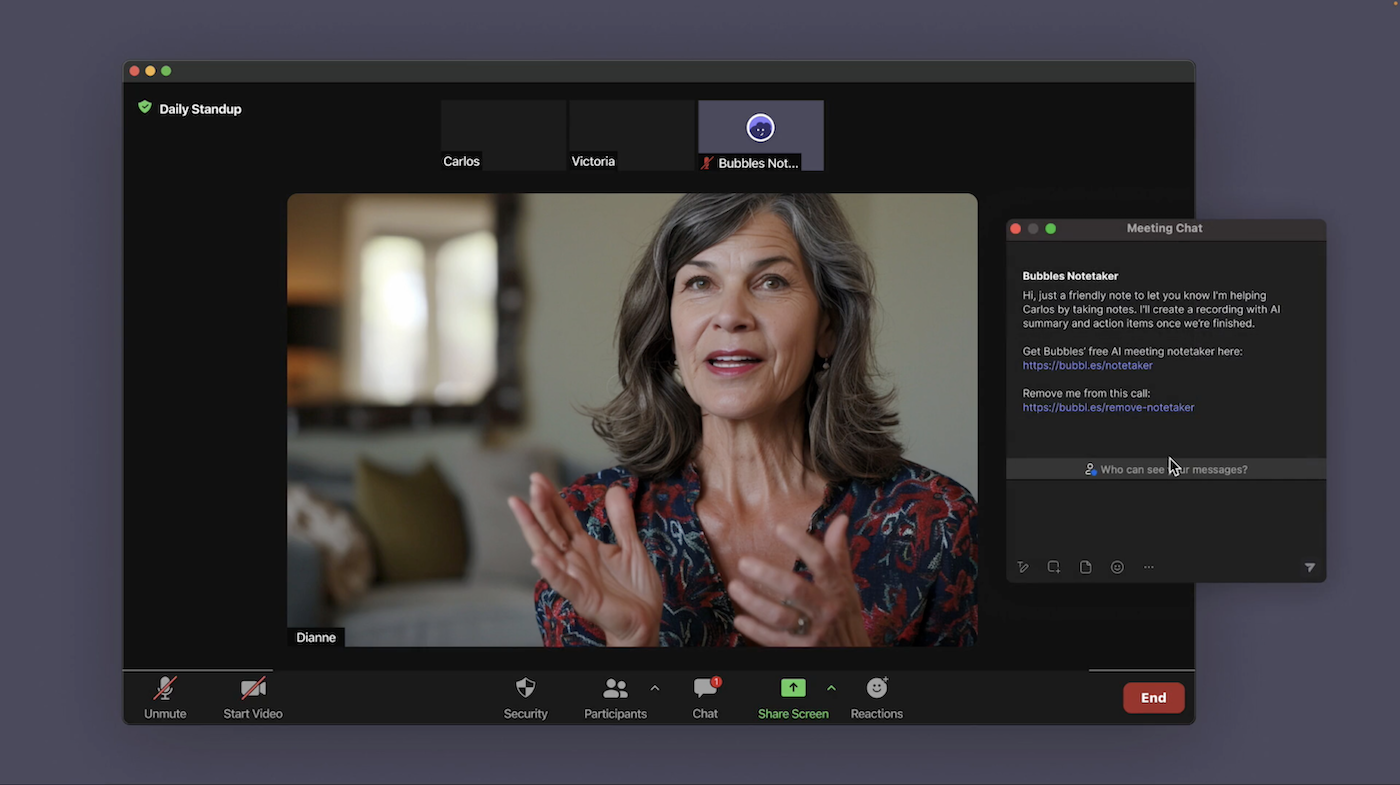
As you can see on the right of this screen, Bubbles will also pop-up with a message in the chat, letting each attendee know who it is, and what it’s there to do. FYI, Bubbles offer a paid plan, where you are able to turn all of this off, while keeping the same note taking capabilities.
Step 4: Access Your Transcribed Meeting Minutes
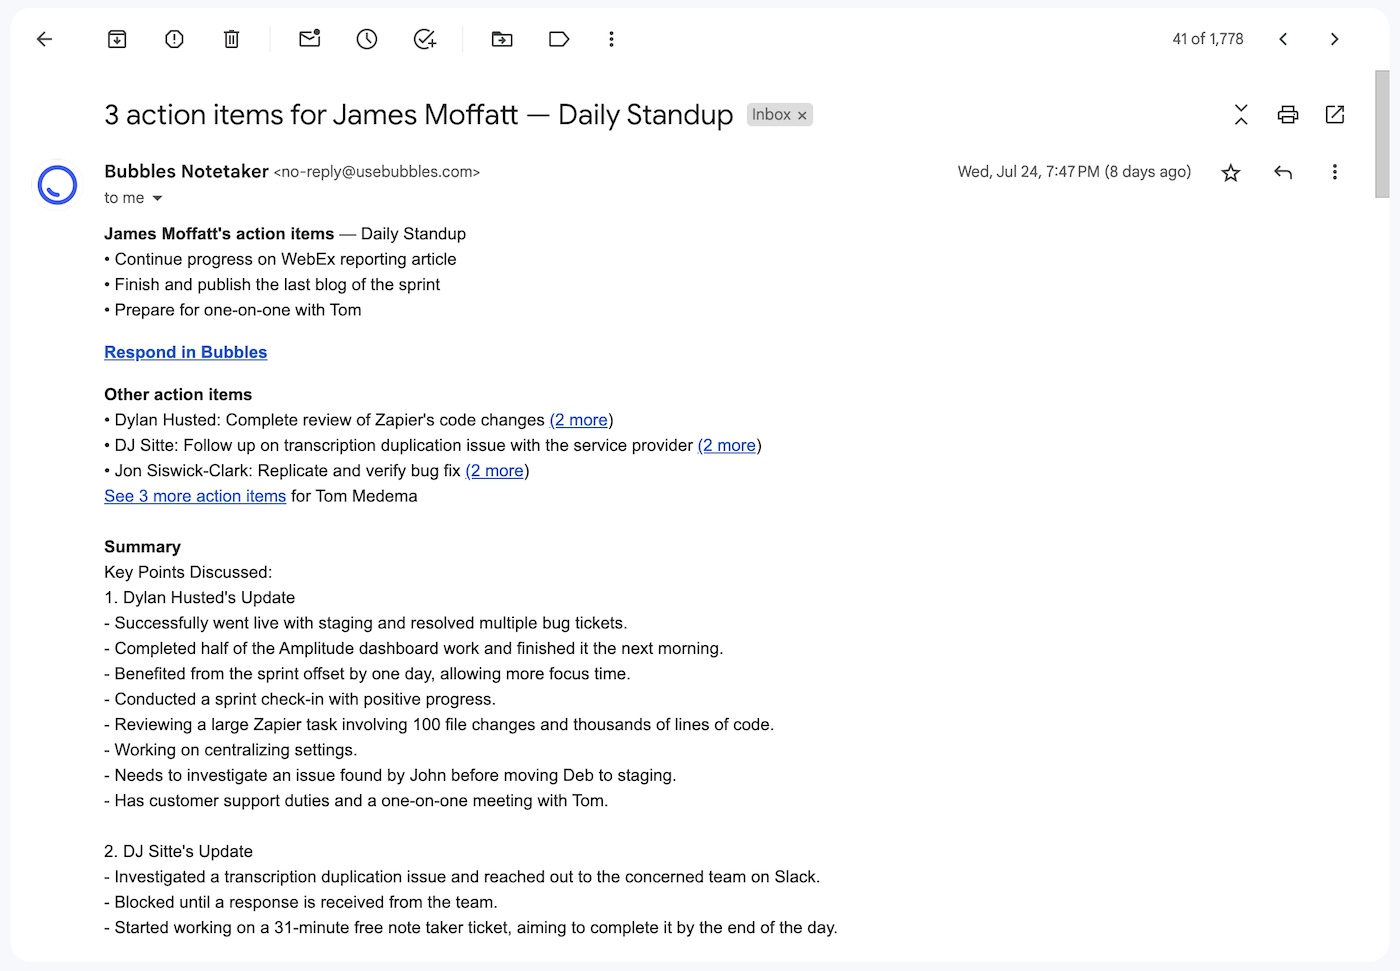
Once your meeting draws to a close, Bubbles will have done everything that needs to be done in terms of meeting minutes. An email will come through within minutes, containing a link to the recording ‘bubble’, alongside your automatically detected action items and a summary of what was discussed and decided. This can often be all that you need as 'meeting minutes', and looks like this:
If you want an extended version, including a longer summary and full meeting transcription, here is what you should do:
Head to your ‘bubble’, where you will find a full recording and a full transcription. From here, you are free to use your transcription and meeting minutes however you desire, including reviewing the meeting, editing, and sharing the content with your team members in order to create a feedback loop.
This is how your automatic meeting minutes transcription will look like if you follow our step-by-step guide:
From here, you can continue the conversation within the ‘bubble’, as you can see above with the ‘Conversation’ tab. Post-meeting conversations within Bubbles can be either text or video/screen recordings, which are offered free of charge and can be sent in response to a meeting recording or transcription.
Alternatively, download the meeting minutes transcription as a document and distribute it via email or your preferred collaboration tool.
After you have received your meeting minutes transcription, you should continue to monitor the progress of the team. As you can see, Bubbles provides each team member and attendee with action items, making it super easy to know next steps. Keep up communication and make sure that everyone is contributing equally. Good luck!
Collaborate better with your team
Get your point across using screen, video, and audio messages. Bubbles is free, and offers unlimited recordings with a click of a button.
.png)

.jpg)


.webp)

Collaborate better with your team
Get your point across using screen, video, and audio messages. Bubbles is free, and offers unlimited recordings with a click of a button.


