How to Transcribe Zoom Meetings and Recordings (Easy + Free)
Zoom is one of the most used online meeting platforms, and rightly so. However, we have all found ourselves in a situation where we forget information from Zoom meetings. Let this be no longer, and learn how to transcribe Zoom easily and for free.

Transcribing your Zoom meetings can be a game changer for post-meeting and overall productivity, both for yourself and for all of your fellow participants who will no longer need to scribble notes down frantically during the meeting. Equally useful is the ability to have a transcription for your meeting recordings. Luckily for you, we have included all the processes that you will need to transcribe your Zoom meetings and recordings in this guide. Check below and become a transcription expert in no time!
Why Transcribe Zoom Meetings?
If you are wondering why you should bother, transcribing Zoom meetings offers several benefits:
- Enhanced Accessibility: You won’t need to aimlessly sift through video recordings as transcriptions make it easier for participants to review the meeting content.
- Improved Focus: A big one - focus on the discussion instead of taking notes.
- Actionable Insights: Transcriptions help to identify the action items set and the decisions you make.
- Better Collaboration: Save everyone time and keep everyone on the same page with transcriptions.
How to Transcribe Zoom Meetings
Step 1: Sign Up for Bubbles
First, visit Bubbles and sign up for a free account. This will give you access to the Bubbles Notetaker and other features that you can explore. When you sign up, you will be prompted to create a Bubbles workspace and connect your calendar. Go ahead and do this so that your upcoming meetings on Zoom sync with your Bubbles Notetaker. This way, the Notetaker will join automatically and transcribe those meetings without you needing to push another button.
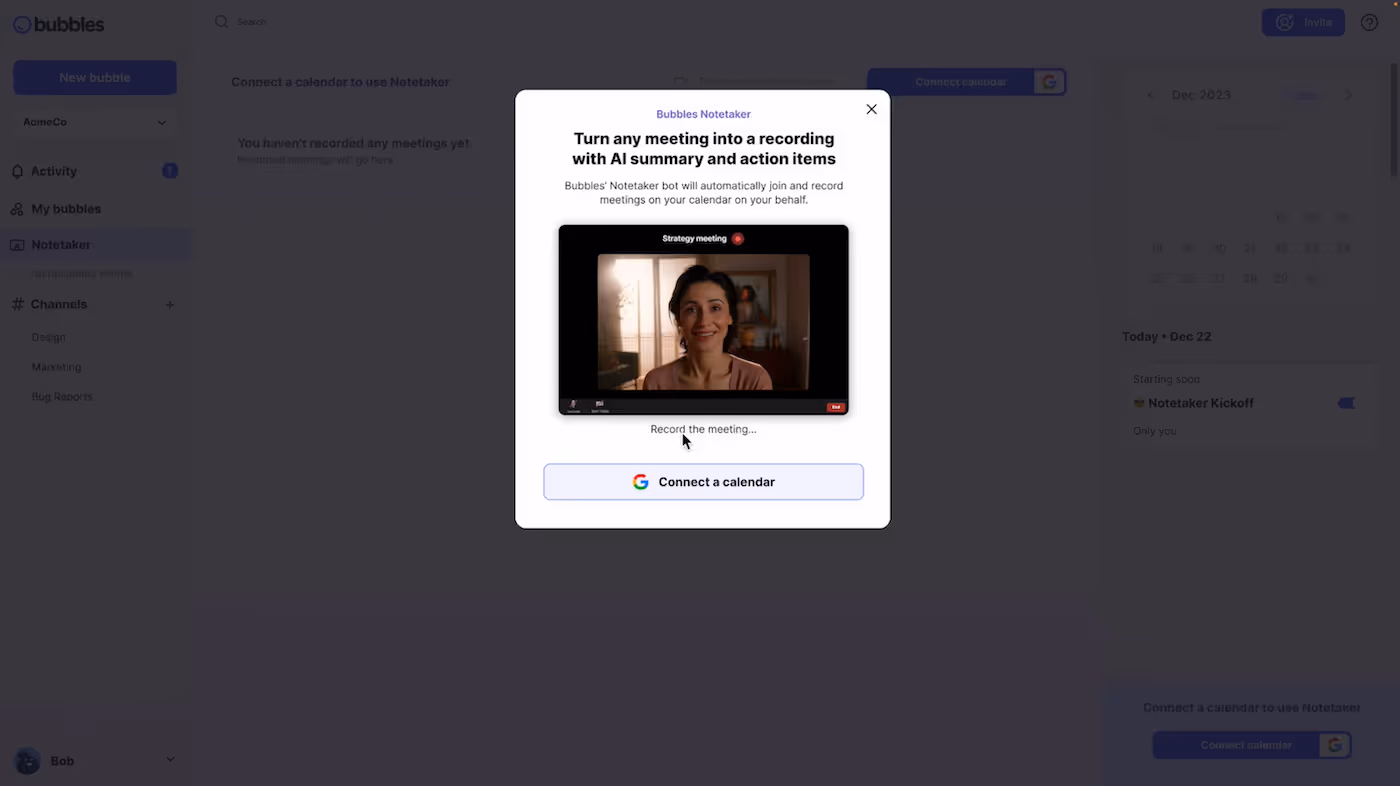
You are also able to get Bubbles by installing the Bubbles Chrome or Edge extension from the Chrome/Edge Web Store (still free).
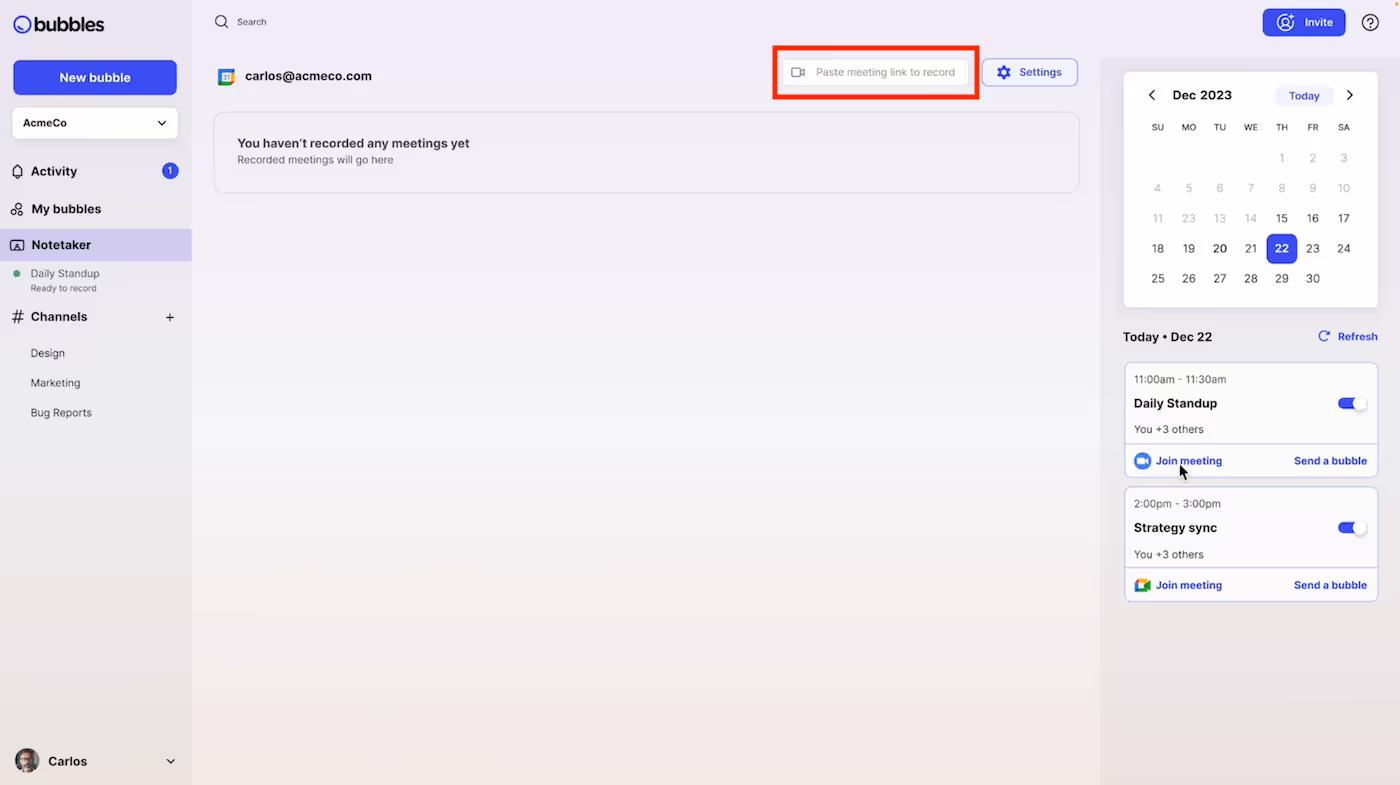
Step 2: Schedule Your Zoom Meeting
Schedule your Zoom meeting as usual. If your calendar is connected, then this is all you are required to do. If not, then ensure that you have the meeting link ready to paste into your Notetaker area, allowing your Notetaker to join an individual meeting. Below, you can see how to do this.
Step 3: Start Your Meeting
Once your meeting starts, Bubbles will automatically join, record, and transcribe the discussion. You don’t need to do anything extra; just run your meeting as usual. Check out how this works in motion below and how it will look to have Bubbles in your next Zoom call.

As you can see on the right of this screen, your Bubbles Notetaker will also let every attendee know who it is, and what it’s there to do.
Step 4: Access the Transcription
After the meeting, Bubbles will process the recording and send you a follow-up email with a link to the recording ‘bubble’, your automatically detected action items, and a summary. The transcription will be available within your meeting recording bubble, where you can review, edit, and share it with your team. Here is an example of how your Zoom meeting transcription will look like if you are using Bubbles:
Additionally, you are able to copy and download your transcript.
Make your
meetings matter
Loved and trusted by 100,000+ users:
- Automatically Record and Transcribe Meetings
- Extremely Accurate Notes, Summaries, and Action Items powered by AI
- Works with Zoom, Google Meet, and Microsoft Teams
- Save time and follow-up with quick async videos
Simply connect your work Google or Microsoft Calendar to get started.

Using Bubbles for Enhanced Productivity
I mentioned some extra features, so I want to go into more detail about how exactly Bubbles can aid your work life, alongside providing you with highly accurate transcription for your Zoom meetings.
Post-Meeting Summary
In addition to the transcription, Bubbles sends a post-meeting summary with key highlights and action items tailored and personalized to you. This is great for a quick meeting recap and ensures that everyone knows their responsibilities right away.
Screen Recorder and Comment Section
Bubbles’ screen recorder feature allows you to record and share detailed explanations of complex ideas. Keeping all communication in one place within your Notetaker recording comment section helps maintain clarity and continuity throughout the project lifecycle. You can also send new screen recordings (bubbles), aside from your Zoom meeting bubbles. This is reserved for those ideas and conversations that don’t need to happen in real-time. This style of communication has been proven by ourselves at Bubbles to reduce meeting time by up to 38%, while maintaining the same output.
How to Transcribe Zoom Recordings with Bubbles
If you have recorded a Zoom meeting and want to transcribe it using Bubbles, follow these steps:
- Upload the Recording: Log into your Bubbles account, begin a new bubble recording (as explained in subsection: Screen Recorder and Comment Section).
- Select the File: Choose the Zoom recording file from your device and upload it so that it becomes the content of the bubble. You can simply drag it across. If you are confused, check the image below.
- Process the Transcription: Bubbles will process the recording and generate a transcription.
- Review and Share: Access the transcription through your “My bubbles” area, review the content, and share it with your team as needed.

Start your new bubble in the top left hand corner, then upload the Zoom recording that you want transcribing.
Getting a Transcription through Zoom
Zoom also offers a built-in transcription feature, available to users with a Zoom Business or higher account. Here’s how you can use it:
- Enable Transcription:
- Log into the Zoom web portal.
- Navigate to "Settings" > "Recording."
- Toggle on "Audio transcript."
- Record the Meeting:
- During your Zoom meeting, click on "Record" and choose "Record to the Cloud."
- Zoom will automatically generate a transcription after the meeting ends.
- Access the Transcription:
- After the meeting, log into the Zoom web portal.
- Go to "Recordings" and select the meeting.
- Click on "Audio transcript" to view, edit, and download the transcription.
Conclusion
Transcribing your Zoom meetings and recordings is a powerful way to stay on top of things and enhance productivity team-wide. Not only this, but you make sure all meeting details are captured accurately every single time. Bubbles offers a seamless, easy, and free solution for recording and transcribing your Zoom meetings, providing you with detailed notes and action items. Zoom’s built-in feature is also available, but you are unable to access this for free, and it is largely reserved for business accounts. Happy transcribing!
Collaborate better with your team
Get your point across using screen, video, and audio messages. Bubbles is free, and offers unlimited recordings with a click of a button.
.avif)


Collaborate better with your team
Get your point across using screen, video, and audio messages. Bubbles is free, and offers unlimited recordings with a click of a button.
.avif)