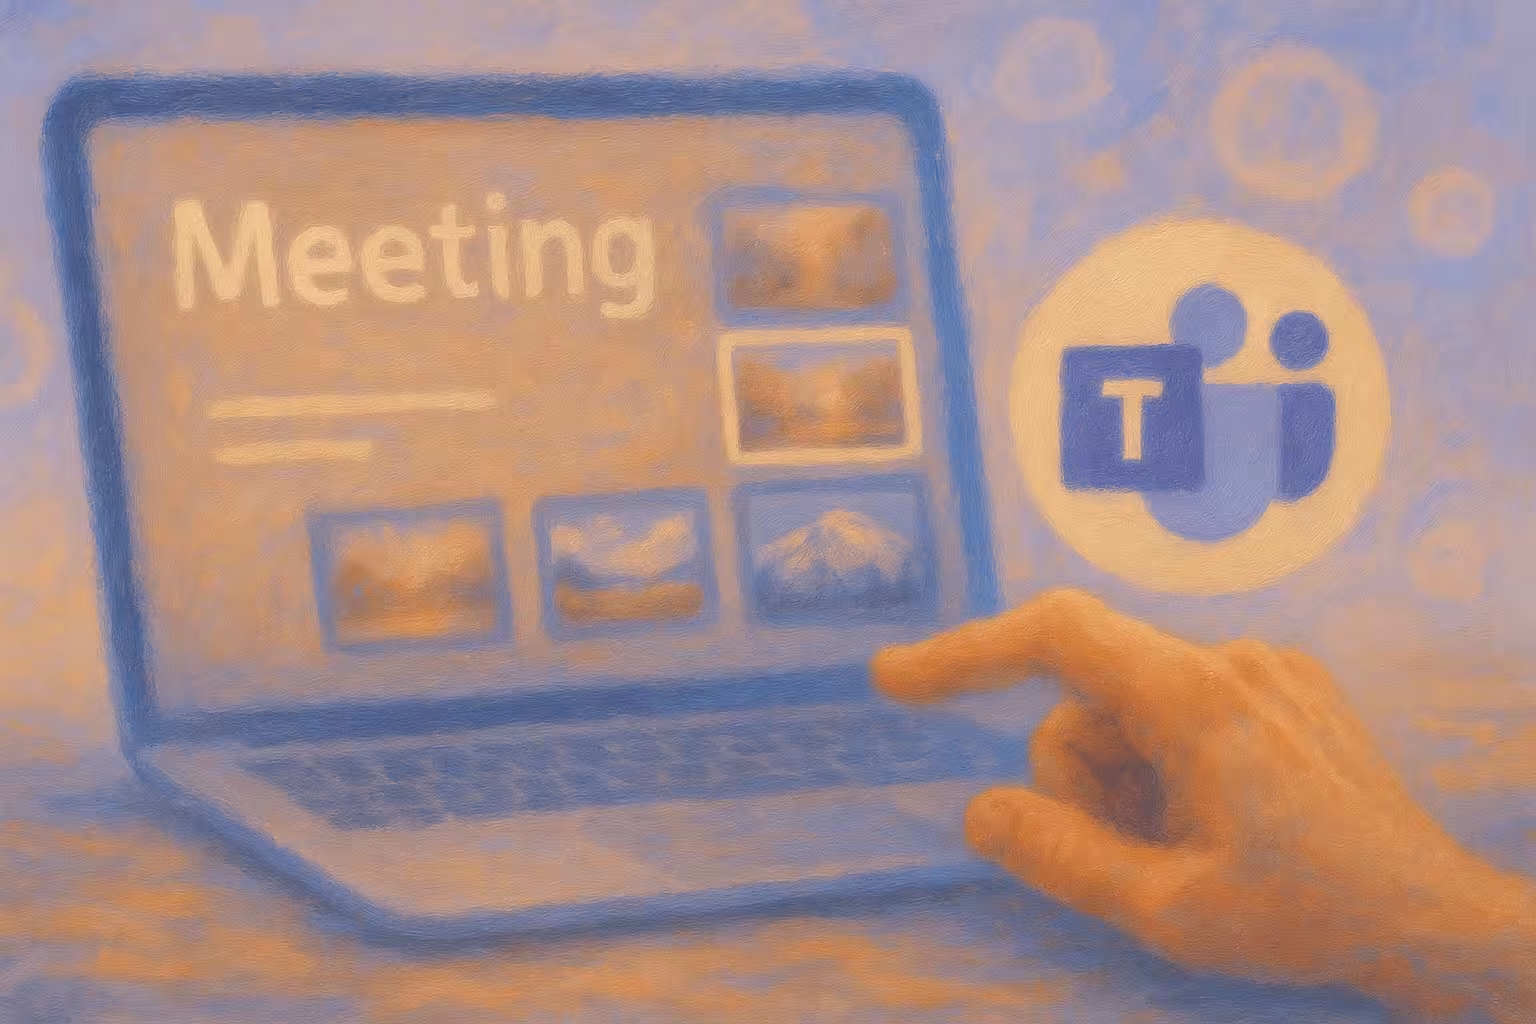
How to Record a Webex Meeting (4 Simple Steps)
A solid, efficient Webex meeting recording technique could be the only thing standing between you and ultimate productivity. After reading this, nothing will stand in your way.

The Webex program by Cisco is one of the most popular ways that people meet online. Now, I don’t know about you but for me, meetings can often be in one ear and out of the other. Therefore, regardless of if you are having a quick check-in meeting, or a critical onboarding session, it is always great to have a recording.
Getting to the stage where you are recording Webex calls is a simple process, but can be done in a few different ways. Here, we provide a detailed guide on how to record a Webex meeting using two methods:
- Using a third-party meeting recorder to record Webex meetings
- Using Webex’s built-in recording feature to record meetings
Webex’s built-in recorder is reserved for hosts only, but we believe all participants need to have this luxury. Due to this, we will start with the method that allows anyone to record Webex. Keep reading to become an expert in Webex recording.
How to Record a Webex Meeting: Bubbles
Bubbles is an intuitive tool designed to simplify the process of recording online meetings. The tool is compatible with all of the popular virtual meeting platforms, including Webex. Follow these steps to record your Webex meeting using Bubbles:
Make your
meetings matter
Loved and trusted by 100,000+ users:
- Automatically Record and Transcribe Meetings
- Extremely Accurate Notes, Summaries, and Action Items powered by AI
- Works with Zoom, Google Meet, and Microsoft Teams
- Save time and follow-up with quick async videos
Simply connect your work Google or Microsoft Calendar to get started.

Step 1: Create a Bubbles Account
- Visit the Bubbles app and create an account. You are able to sign up for free with Bubbles, and will be able to create a workspace where your team can store and use your Webex recordings.
- Connect your calendar to Bubbles in order for your upcoming Webex meetings to sync to Bubbles Notetaker.
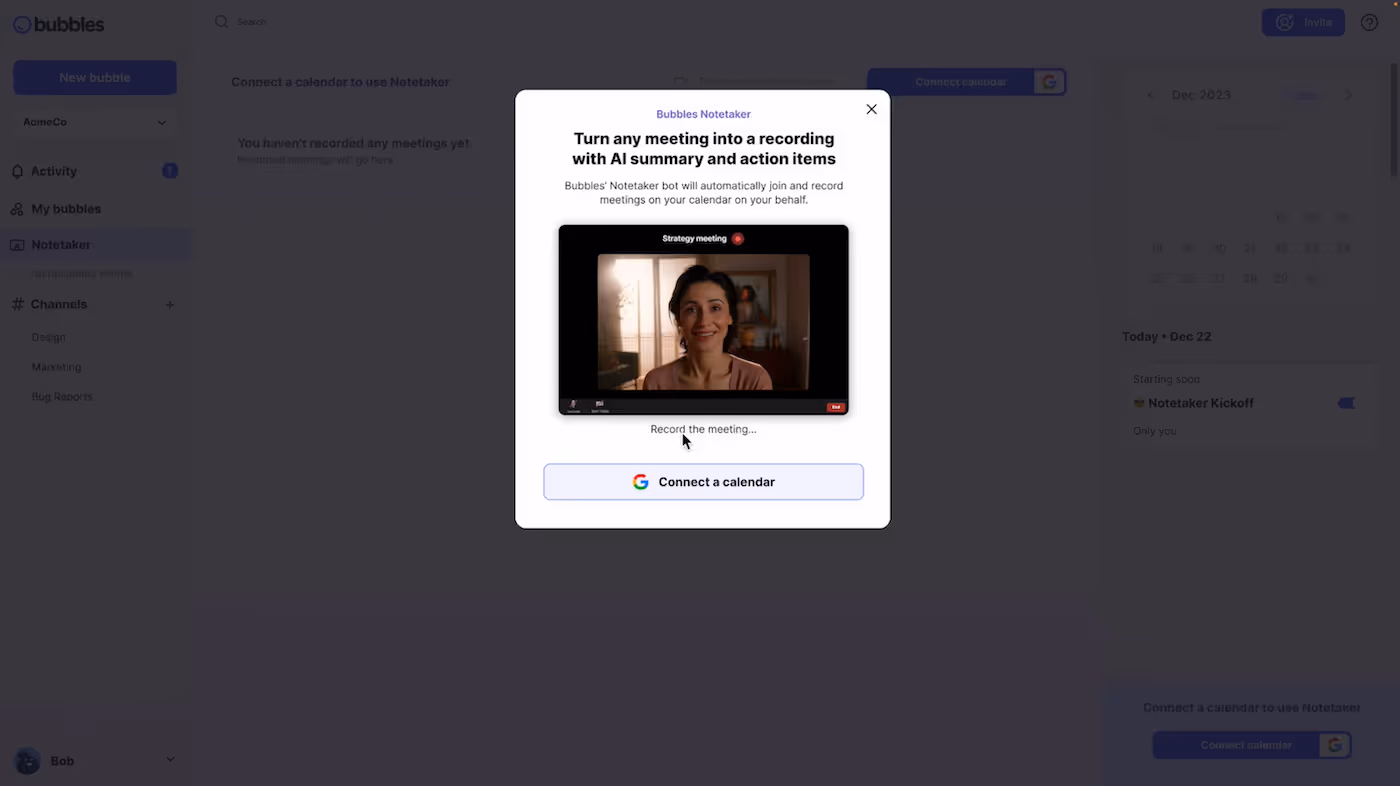
This will allow Bubbles to join meetings automatically and begin the recording process. Once a calendar is connected, you will see your upcoming meetings on the right hand side of your Notetaker area, as shown below.
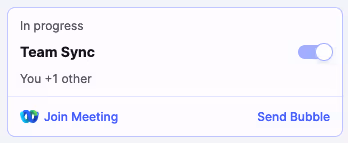
Step 2: Customize Recording Settings
- Adjust your recording preferences in Bubbles as desired to specify which meetings Bubbles will automatically join and record. This can include meetings with external participants or all internal team meetings, such as a daily standup, for example. Use the blue toggle shown in the image above to make these changes, or head into your settings for further customization (removing Bubbles branding from meetings etc).
- Schedule your meeting. Proceed as normal, scheduling your next Webex meeting. As you connected your calendar, your Notetaker will register this and get ready to join once the meeting commences.
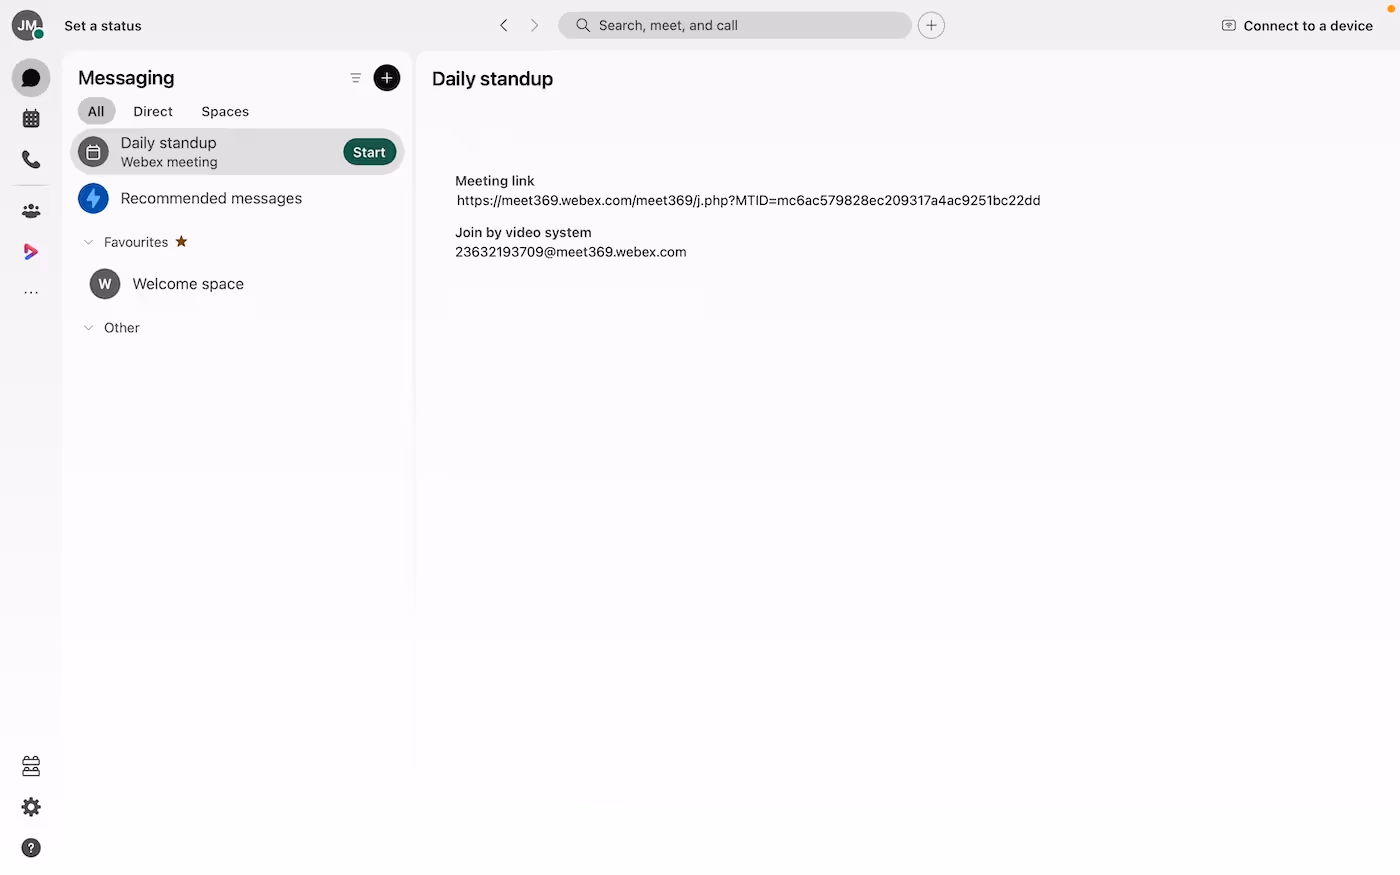
Step 3: Start Your Webex Meeting
- Launch Webex. Open the Webex application on your computer and start or join the meeting you wish to record. Otherwise, you can also join through your Bubbles Notetaker, as seen above in step 1.
- Let your Notetaker into the meeting. As soon as your meeting begins, Bubbles' Notetaker will be there, waiting to be let in. Once you allow your Notetaker to join, it will automatically start recording, capturing and transcribing every word. This process is demonstrated in my Webex call below. Regardless of whether you join the Webex meeting via your calendar, Webex, or through Bubbles, your Notetaker will be there!
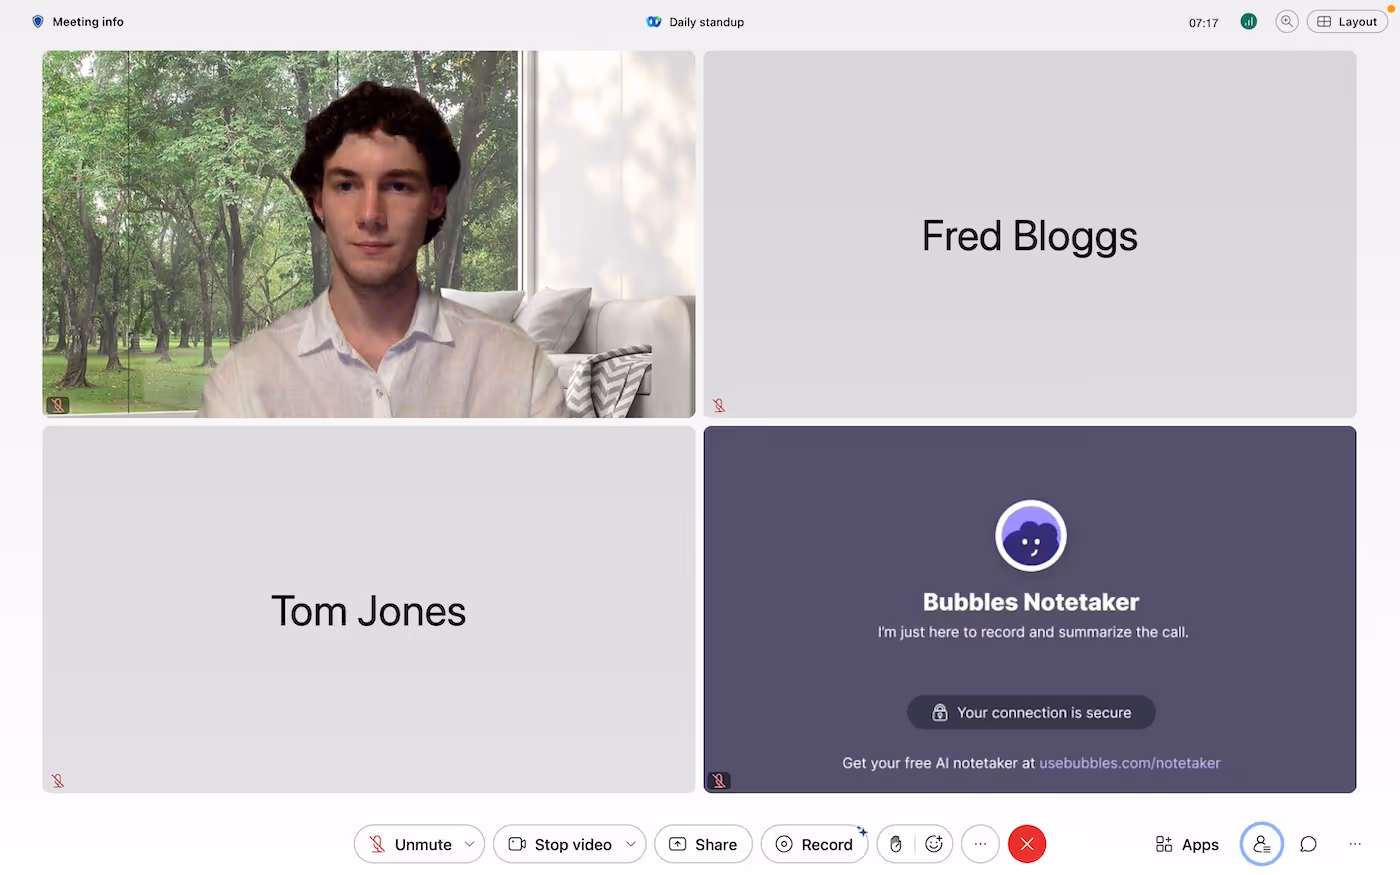
FYI, your Bubbles Notetaker will post a courteous message in the Google Meet chat to introduce itself and explain its purpose. Anyone is able to remove the Notetaker at this point, keeping things fair.
Step 4: Receive Your Webex Recording
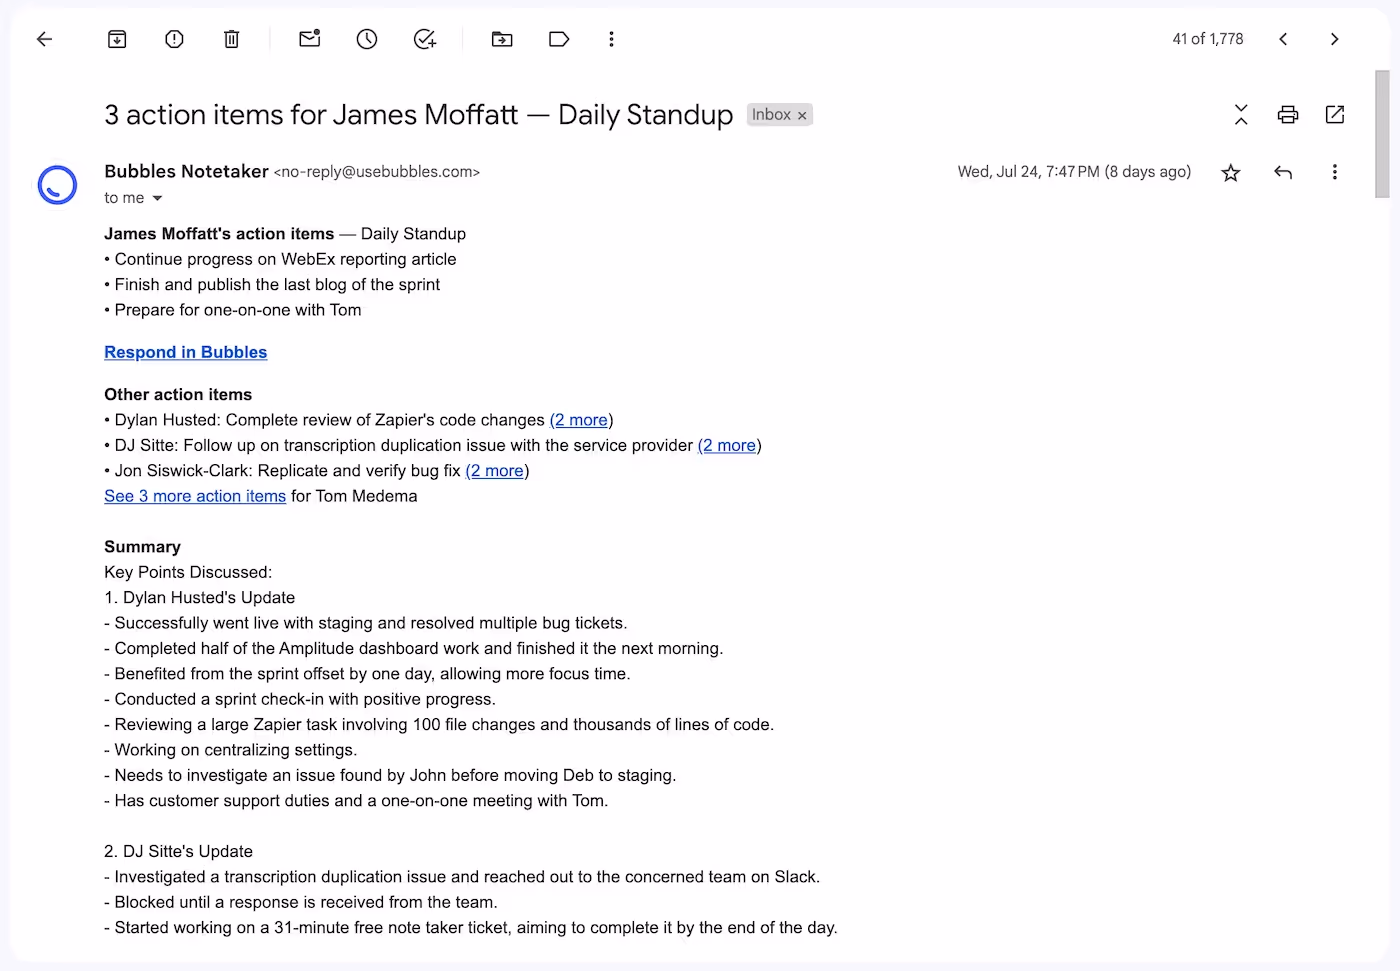
- Once you complete your Webex meeting, you will receive your Bubbles recording almost instantly. This is where Bubbles truly excels, as demonstrated by the images below. The Webex meeting recording will be accessible in your Notetaker section within Bubbles, and the recording will look like this:
You can continue conversation alongside the recording and transcript, which I find helpful for clarity.
Additionally, a link to the recording, along with a summary, action items, and other details, will be sent to all participants in an automatic post-meeting recap email:
At this point, you can revisit the Webex meeting and review the recording and transcript. You can invite an unlimited number of teammates to leave comments and offer their feedback.
One additional advantage is that you can download your Webex bubbles. Bubbles also integrate seamlessly with various popular project management tools like Notion and Slack, allowing you to place your recording wherever you need it for further collaboration.
So, that is our top suggestion for recording Webex calls. As I mentioned, we will also cover the process for recording via Webex itself. Let's get into this now.
Recording a Webex Meeting using Webex's Built-in Feature
Webex offers its own recording functionality, which can be accessed easily through the application.
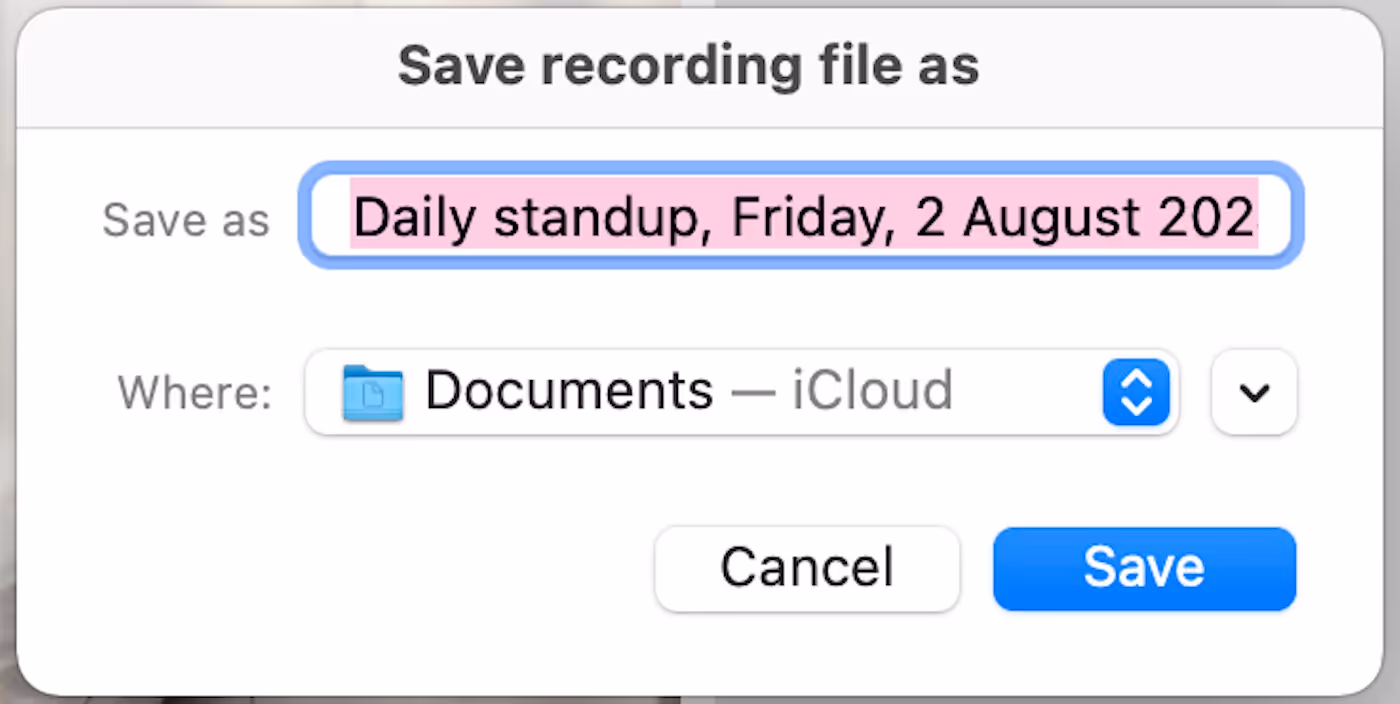
There are some downsides to this, which is why we do not recommend it as heavily. For example, if you are using a free account, you can only record using the desktop app, rather than through your browser. Additionally, you have no other option than to save your recording locally on your computer. This is how this will look in-app:
Anyway, follow these steps to record your Webex meeting using Webex's built-in recording feature:
Step 1: Start or Join a Webex Meeting
- Launch Webex: Open the Webex application on your computer and start or join the meeting you want to record.
- Ensure Permissions: Make sure you have the required permissions to record that specific meeting. Typically, only hosts or co-hosts have recording privileges, and participants will need to request recording permission. Again, we see this as a fairly large downside, as everyone should have this ability.
Step 2: Initiate Recording
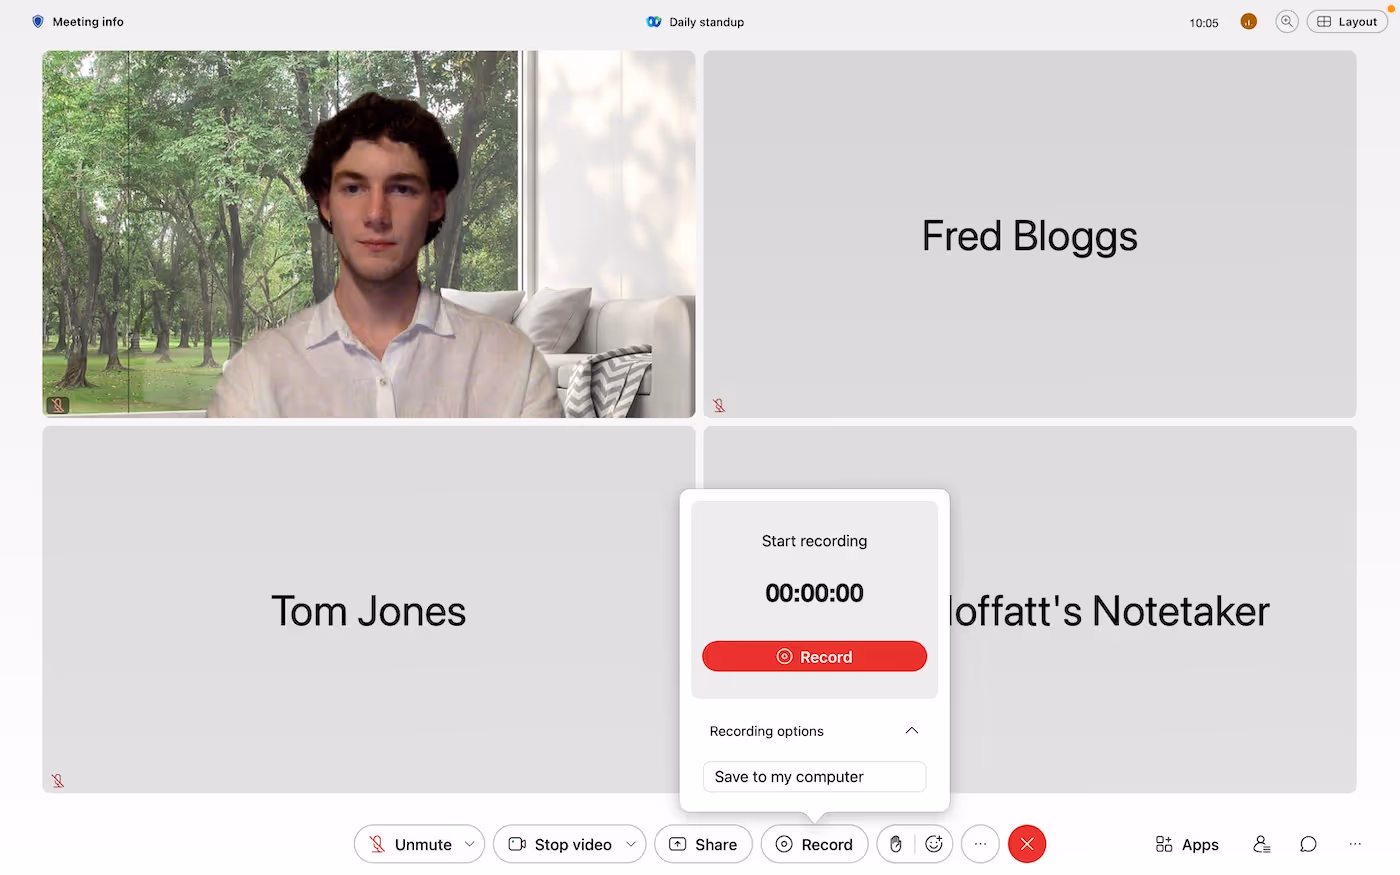
- Locate the Record Button: Once your meeting has started, locate the 'Record' button in the Webex meeting controls at the bottom of the screen. I’ll help you out here by demonstrating this below.
- Start Recording: Click the 'Record' button. As you can see above, you are going to be prompted to choose where you want to save the recording, which will be locally on your computer if you don’t have a paid plan (allows cloud storage).
That’s the beauty of Bubbles, as all of your recordings are organized and stored in-app.
Step 3: Manage the Recording
- Pause/Resume Recording: While you are progressing through your Webex call, you can pause and resume the recording whenever you like. Navigate this with the buttons in the recording controls area.
- Stop Recording: When the meeting draws to a natural close, or you simply don’t want to record any more, click the 'Stop' button and end the recording.
Step 4: Access and Share Your Recording
- Locate Your Recording: When your meeting ends, the recording will be processed, and then you are able to find them in the area you assigned them to be stored within.
That's all, folks. You are now an expert in recording Webex meetings, regardless of whether you're the host, a participant, or whether you opt for a less restrictive, more effective recording technique, such as Bubbles Notetaker.
No matter how you choose to record, you are now all set to capture important information and create a system of effortless knowledge sharing.
Get this implemented now, so that your next Webex is a roaring success, both during the meeting and in the meeting follow-up process.
Collaborate better with your team
Get your point across using screen, video, and audio messages. Bubbles is free, and offers unlimited recordings with a click of a button.
.avif)


Collaborate better with your team
Get your point across using screen, video, and audio messages. Bubbles is free, and offers unlimited recordings with a click of a button.
.avif)