How to Transcribe Microsoft Teams Meetings and Recordings
If Microsoft Teams is your preferred meeting software and you want to ensure all details are captured, mastering automatic transcription is essential. This guide will walk you through the steps to effortlessly transcribe your Microsoft Teams meetings.

As of 2024, Microsoft Teams has 320 million users worldwide. That’s 320 million users who should be receiving transcriptions for each online meeting they take part in via Teams. The reality is that this is far from being the case.
You might therefore wonder why this is best practice for virtual meetings, but with a comprehensive Teams transcription, you will boost your collaborative power, focus, and accessibility, while expending less effort due to the ease of automation when it comes to transcribing. Let me show you how.
How to Transcribe a Teams Meeting
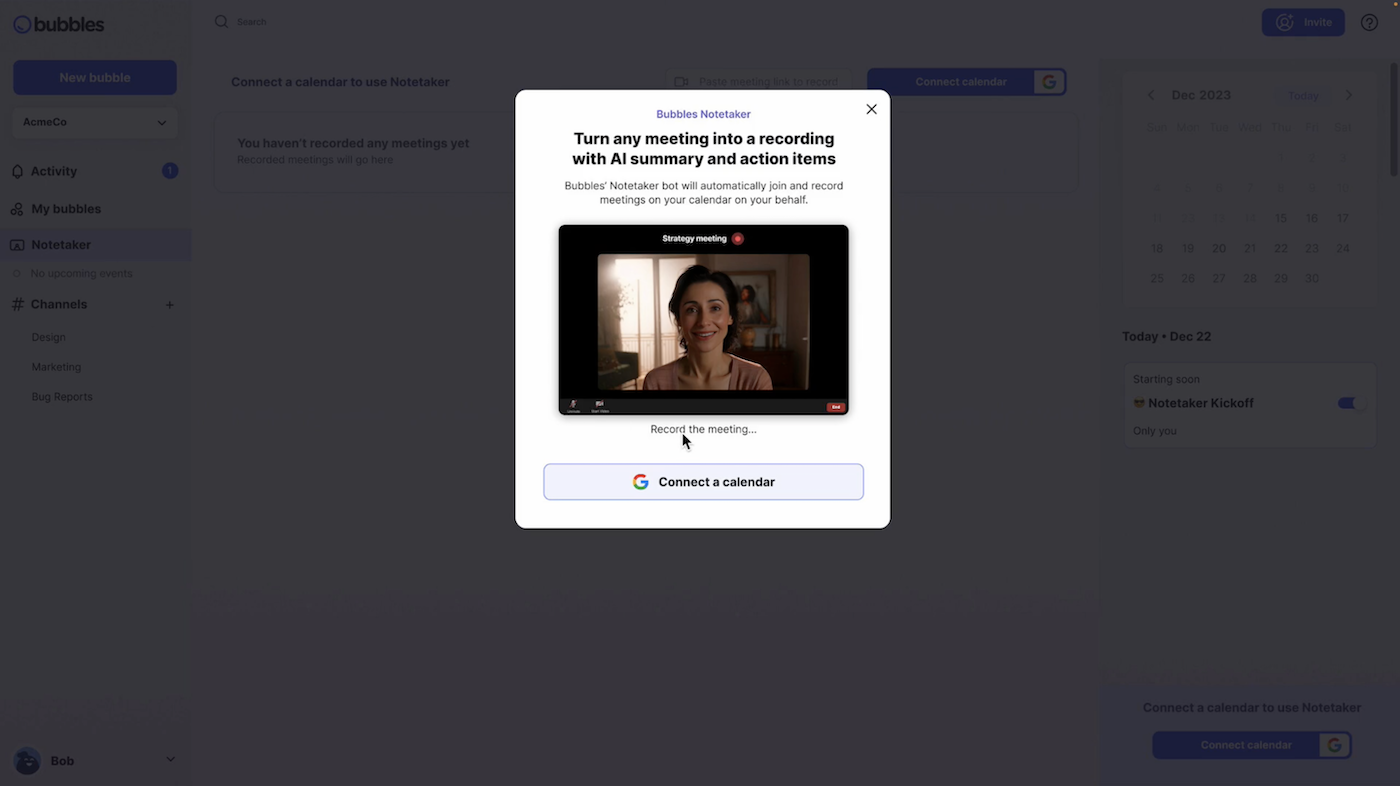
Step 1: Sign Up for Bubbles
Start by visiting the Bubbles app and creating a free account. This will give you access to their transcription and notetaking features.
When signing up, you will be required to create a Bubbles workspace, which can simply be your company or team name (easily identifiable to teammates). You will also be required to connect your calendar. Once you do so, Bubbles will be set up to sync with your upcoming Microsoft Teams meetings, joining them automatically to transcribe your conversations.
Also, you can get started by installing the Bubbles Chrome or Edge extension from the Chrome or Edge Web Store.
Step 2: Schedule Your Teams Meeting
Continue as normal and schedule your Teams meeting, as demonstrated here:
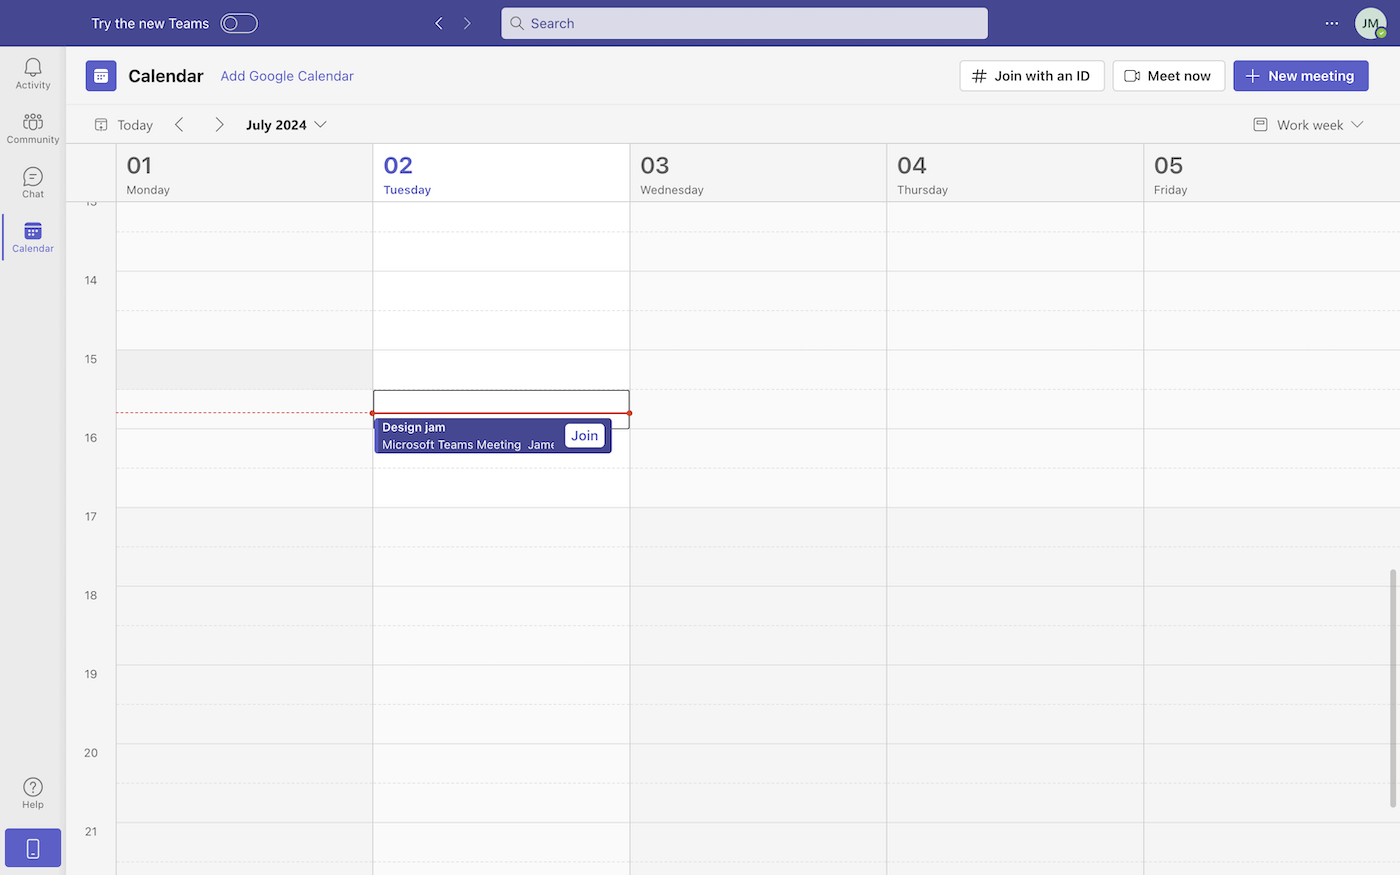
Because you connected your calendar in step 1, your upcoming Teams meeting will appear on the right-hand side of your Notetaker area within Bubbles.
As a side note, you can also use your Teams meeting link to get your transcription going, by pasting it into your Bubbles Notetaker area “Paste meeting link to record” section.
Step 3: Start Your Teams Meeting
Start your meeting as usual and follow your go-to virtual meeting etiquette. You don’t need to change anything, as Bubbles will automatically join, record, and transcribe the conversation taking place in your Teams meeting. You can focus entirely on the dialogue without worrying about note-taking.
Here is an example of how it will look like to have Bubbles transcribing your Microsoft Teams meeting in real-time:
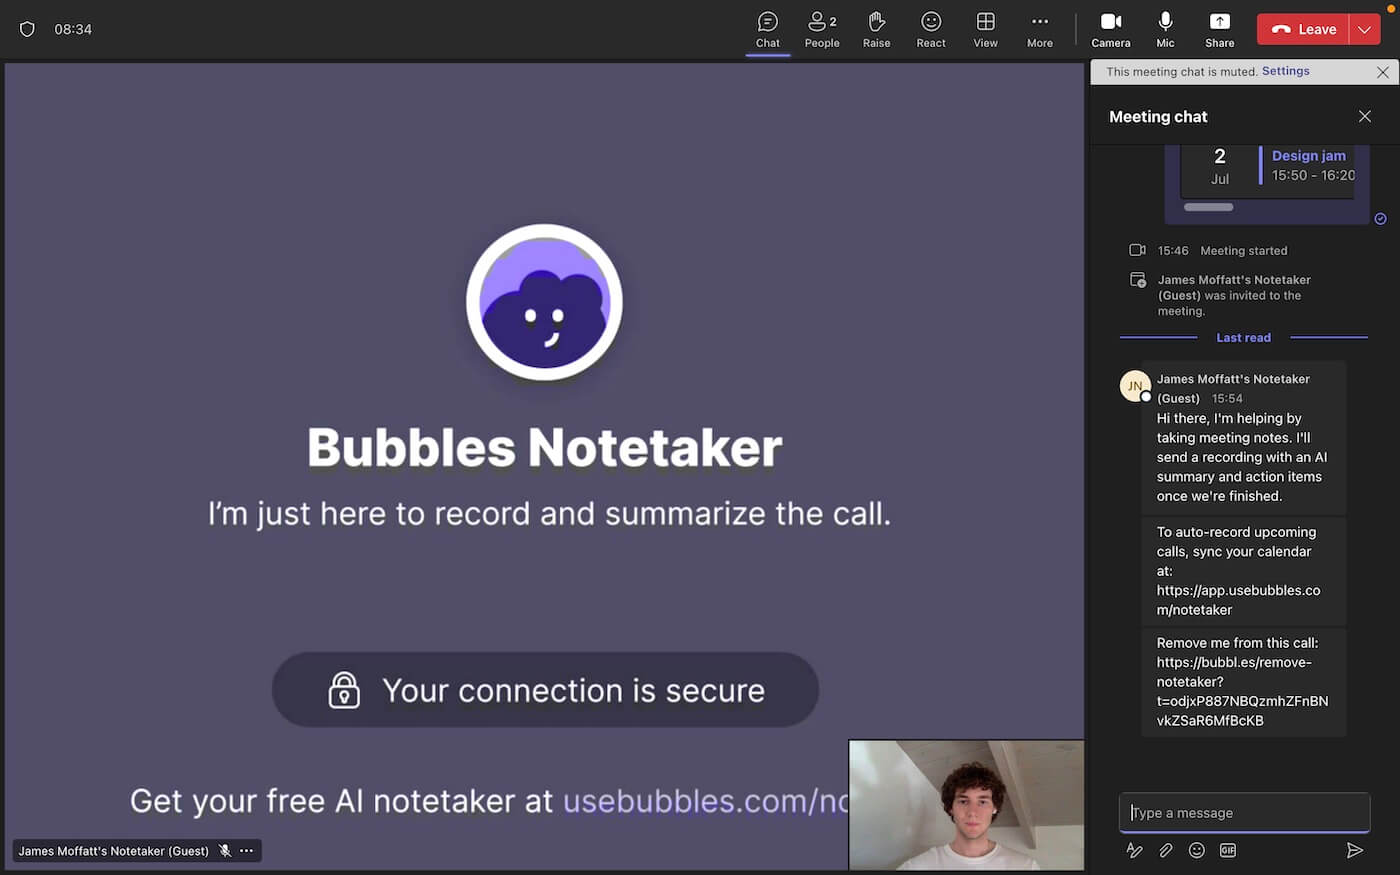
As displayed on the right side of the screenshot above, your Bubbles Notetaker will notify all participants of its role and purpose in the Teams meeting chat.
You can optionally remove Bubbles branding, gain unlimited recording length, and never have transcriptions expire by upgrading to Teams Pro for 8$.
Step 4: Access the Transcription
When your Teams meeting draws to its natural close, Bubbles processes the recording and sends you a follow-up email. In this email, you will have a link to a “bubble”, within which your Teams meeting recording and transcription will be. The transcription is clearly laid out alongside a full recording, as you can see demonstrated below:
The clarity makes your post-meeting review, editing, and sharing super easy.
Make your
meetings matter
Loved and trusted by 100,000+ users:
- Automatically Record and Transcribe Meetings
- Extremely Accurate Notes, Summaries, and Action Items powered by AI
- Works with Zoom, Google Meet, and Microsoft Teams
- Save time and follow-up with quick async videos
Simply connect your work Google or Microsoft Calendar to get started.

How to Transcribe a Microsoft Teams Recording
If you need to transcribe your recorded Microsoft Teams meetings, I’ve got you covered. Here’s how you can do it effortlessly based on my personal experiences:
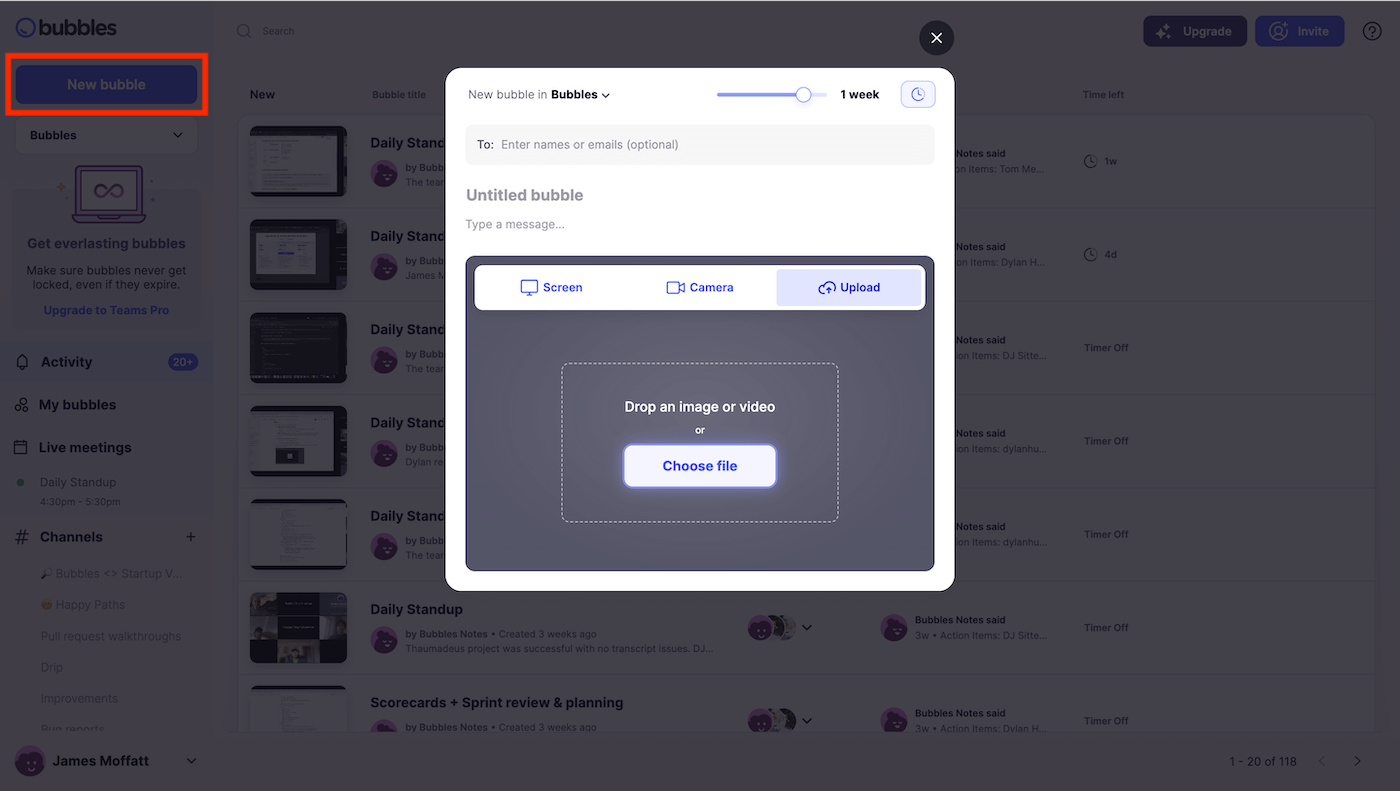
Step 1: Upload the Recording
Log into your Bubbles account and start a new bubble recording session.
Step 2: Select the File
Find and upload the Microsoft Teams recording file from your device to use as the content for your new bubble. You need to do this so that Bubbles can review the meeting and transcribe it perfectly. You can drag and drop it easily. Refer to the image below for guidance if needed.
Step 3: Process the Transcription
Bubbles will process the recording to generate a complete transcription rapidly.
Step 4: Review and Share
Locate the transcription of your Microsoft Teams meeting in your “My bubbles” section. You will be able to name your bubble, so as to make it match perfectly with what was discussed in the recorded meeting.
By using this method, you are able to cherry-pick which meetings are transcribed for you. Bubbles has an option to disable the Notetaker prior to the meeting anyway, but this is reserved for instances where you thought transcription was unnecessary, but on reflection was.
Personally, I find that meetings like a design review or design jam often don’t need to be fully recorded and transcribed, but when something critical happens, it is important to be able to rectify this post-meeting.
Microsoft Teams Built-in Transcription Feature
Microsoft Teams also offers a built-in transcription feature. Here’s how you can enable and use it:
Enabling Transcription in Microsoft Teams
- Start or Join a Meeting:
- Open Microsoft Teams and start or join a meeting.
- Enable Transcription:
- Click on the three dots (More actions) in the meeting controls.
- Select "Start transcription."
Viewing and Using the Transcription
- During the Meeting:
- The transcription will appear on the right side of the meeting window.
- After the Meeting:
- Once the meeting ends, go to the meeting chat or the "Files" tab.
- Find the transcription file, which you can review, edit, and share as needed.
Disadvantages of Using Microsoft Teams’ Built-in Transcription
- Language Restrictions: The transcript language must be the same as the language being spoken in the meeting. With Bubbles, for example, you can meet in any language and the transcription will adjust.
- Expensive: Microsoft Teams does not provide transcription services for free. To access recording or transcription features, you need an Enterprise or Business account. These accounts require a monthly subscription fee, which varies based on the size of your organization. Bubbles, on the other hand, is free.
For more detailed information, visit the Microsoft Support page.
Conclusion
Transcribing interviews has never been easier, but you need to remain clued-up. With the Bubbles app, you can automatically record and transcribe your Microsoft Teams meeting, and capture every detail. Yes, Teams offer similar features themselves, but as we have covered, they are costly, and they are not guaranteed to be fully personalized to you and your business. For Teams transcription, we recommend using a separate tool.
Collaborate better with your team
Get your point across using screen, video, and audio messages. Bubbles is free, and offers unlimited recordings with a click of a button.
.png)


Collaborate better with your team
Get your point across using screen, video, and audio messages. Bubbles is free, and offers unlimited recordings with a click of a button.