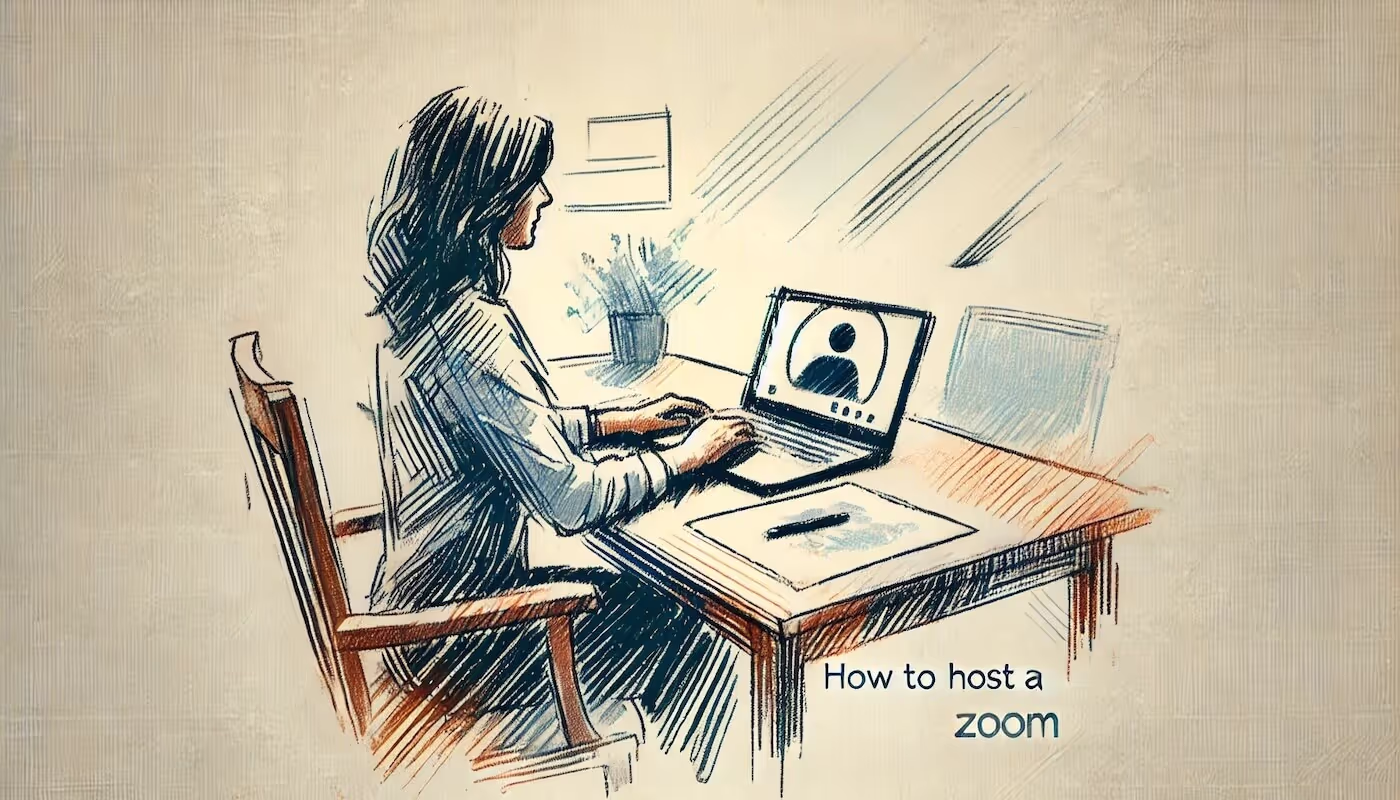
How to Host a Zoom Meeting: A Complete Guide
Learn everything there is to know about hosting Zoom meetings.

Zoom has become a real go-to when it comes to virtual meetings, with millions of users worldwide relying on it for everything from team daily standups to large-scale webinars, myself included. While attending a Zoom meeting is relatively simple, hosting one requires a bit more preparation and knowledge.
In this guide, we will walk you through everything you need to know about hosting a Zoom meeting effectively, covering topics from creating a Zoom account to utilizing third-party meeting technology that integrates with Zoom to make the whole experience more manageable.
Creating Your Zoom Account
To host a meeting on Zoom, the first step is to create an account, if you don't have one already. Here’s how you do it:
- Go to the Zoom Website: Visit zoom.us and click the “Sign Up Free” button.
- Sign Up: You can register with your email address or sign up via Google, Facebook, or Apple. Zoom will send a verification email.
- Complete Setup: Once you verify your email, you’ll be prompted to create a password and add some personal details. After that, your account is ready to go, and you will be too.
Can You Create a Zoom Meeting for Free?
Yes, Zoom offers a free plan that allows you to create meetings with some restrictions. Free users can:
- Host meetings with up to 100 participants.
- Hold meetings for 40 minutes with three or more participants (one-on-one meetings are unlimited in duration).
If these limits are enough for your needs, you can continue with a free account. For larger, longer meetings or premium features, you’ll need to upgrade to a Pro or Business plan.
Technology to Use When Hosting a Zoom Meeting
Hosting a Zoom meeting effectively requires the right technology. With that in mind, and now that you have sorted out our Zoom account, you should get your hands on any other useful tech that can help you with Zoom at this stage too.
One of the best tools you can use alongside Zoom is Bubbles Notetaker. Having used this tool extensively myself, I feel qualified to explain how Bubbles might just change Zoom for you.
Bubbles Notetaker: Automate Meeting Transcription and Recording
Bubbles Notetaker is an AI-powered tool that integrates seamlessly with Zoom meetings to enhance productivity and accuracy. Here’s how Bubbles works:
- Easy Integration with Chrome or Edge Extension: You can invite the Bubbles Notetaker to your Zoom meeting via the Bubbles Chrome/Edge extension. Simply paste the Zoom link into the extension, and the AI assistant will automatically join your meeting.
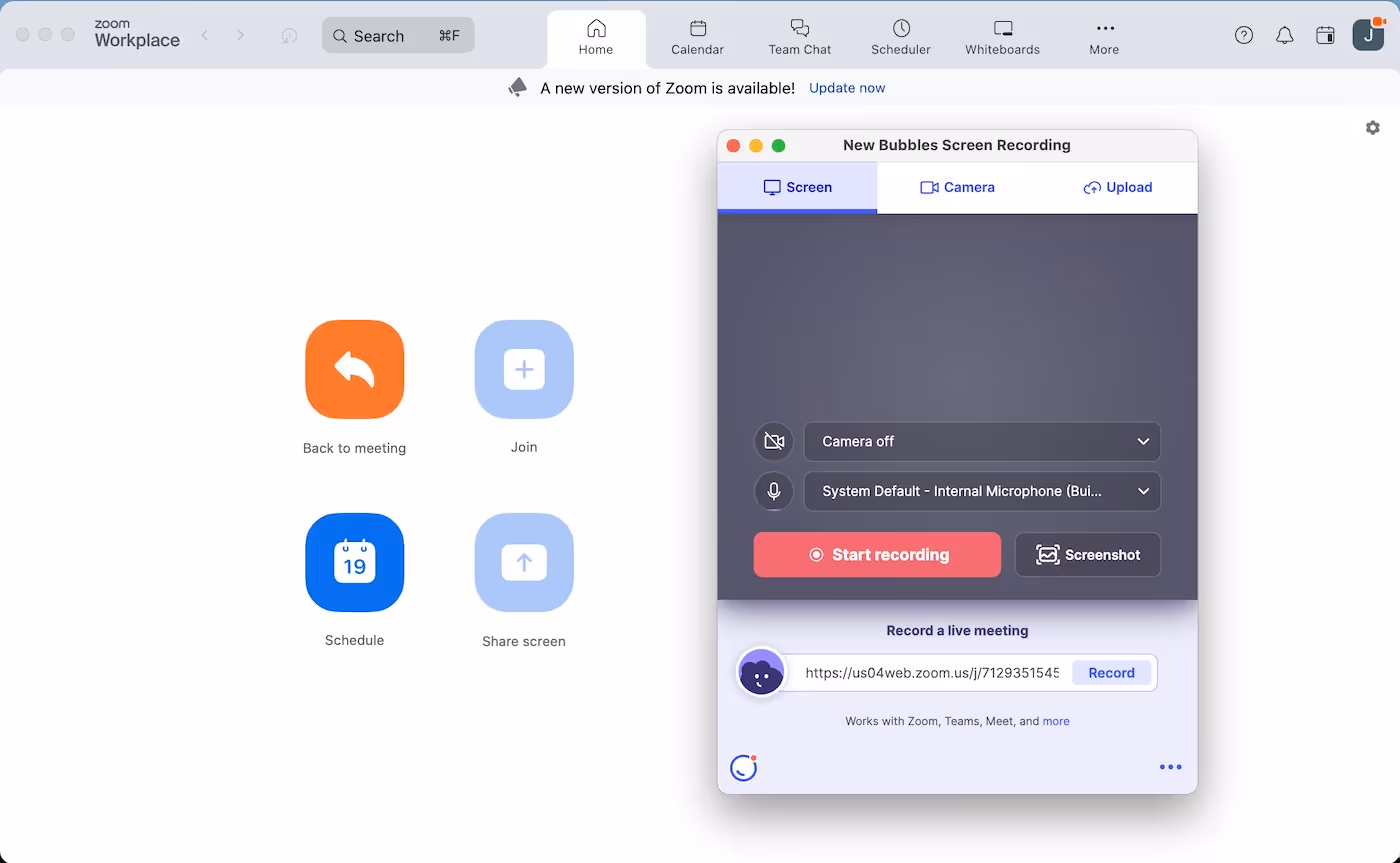
- Recording & Transcribing: Bubbles not only records the Zoom meeting but also generates highly accurate Zoom meeting transcriptions in real-time. This can save hours of manual note-taking and provide a record for participants who could not attend.
- Meeting Summaries: Once the meeting concludes, Bubbles sends a follow-up email to all selected attendees with the meeting summary, action items, and a link to the full recording and transcription. This is a great way to keep everyone aligned and informed.
- AI-Generated Action Items: Bubbles automatically identifies key action items and next steps, making it easier for you to follow up with your team.
Using Bubbles means that your Zoom meetings are productive and nothing gets missed. Not only this, but introducing Bubbles to your meeting as the host is great virtual meeting etiquette - as everyone will have access to the recording, transcription, and action items.
Bubbles also stands out from the other AI meeting note takers in our opinion due to the great options for post-meeting collaboration that you will have in your Bubbles workspace, and because of how generous Bubbles' free plan is.
Scheduling a Zoom Meeting
Once your account is set up, scheduling a Zoom meeting is easy.
- Sign In: Log into your account through the web portal, Zoom desktop app, or Zoom mobile app.
- Click "Schedule a Meeting": On the dashboard, you’ll see an option to schedule a new meeting.
- Input Meeting Details:
- Topic: Give your meeting a clear title.
- Description: Optional, but helpful if your meeting has multiple objectives.
- Date & Time: Set the correct time and make sure to account for different time zones.
- Meeting ID: Choose whether to generate automatically or use your personal meeting ID.
- Security Settings: Consider adding a passcode or enabling the waiting room for added security.
- Advanced Options: Decide whether to allow participants to join before the host or whether to automatically record the meeting. If you connect your calendar to Bubbles, you will not need to make this choice for recording the meeting, as your Notetaker will automatically join.
- Send Invitations: Zoom will generate an invitation link and you can share this link via email or calendar invites with the participants.
Can a Zoom Meeting Start Without the Host?
Zoom allows meetings to start without the host, but only if the "Join Before Host" option is enabled during the scheduling process. This option lets participants join and interact with one another before the meeting officially starts. If this setting isn’t enabled, attendees will be placed in a waiting room until the host begins the session. This is entirely up to you as the meeting's host.
Make your
meetings matter
Loved and trusted by 100,000+ users:
- Automatically Record and Transcribe Meetings
- Extremely Accurate Notes, Summaries, and Action Items powered by AI
- Works with Zoom, Google Meet, and Microsoft Teams
- Save time and follow-up with quick async videos
Simply connect your work Google or Microsoft Calendar to get started.

How to Start, Host and Manage the Zoom Meeting
Once your meeting time approaches:
- Log In to Your Zoom Account: Go to the Zoom app or log in through the web portal.
- Start the Meeting: Click on the "Start" button next to your scheduled meeting. This will launch the session, and as the host, you’ll have control over various settings. Alternatively, you can click the link in the meeting invitation and the Zoom app will launch, starting your meeting.
- Manage Participants:
- Mute/Unmute: Control who is allowed to speak to avoid background noise.
- Allow Screen Sharing: Grant participants the ability to share their screens, especially if you are hosting a presentation or collaboration session.
- Create Breakout Rooms: Divide attendees into smaller groups for more focused discussions.
- Record the Meeting: As the host, you have control of letting Bubbles Notetaker into the meeting room to record the meeting and share it with participants later. Depending on your settings, Bubbles may be able to join automatically. With the Bubbles Chrome/Edge extension, you will be inviting the Notetaker directly, so recording will begin instantly when you paste your meeting link into the extension.
How to Host a Zoom Meeting on Mobile
Zoom’s mobile app makes it easy to host meetings from anywhere:
- Download the Zoom App: Get the latest version from the App Store or Google Play.
- Sign In: Use your Zoom account to log in.
- Tap "New Meeting": This will start an instant meeting. Alternatively, you can schedule a future meeting by selecting "Schedule."
- Start the Meeting: Once participants join, you can manage the meeting by using features like mute/unmute, screen sharing, and participant management, just like on the desktop version.
What Do You Say When Hosting a Zoom Meeting?
This is a bit of a tricky question to answer, as there isn't one determined blueprint. However, as the host, it’s your responsibility to guide the meeting, so you are right to be paying this attention. Here are a few pointers that could help to set the tone:
- Welcome Participants: Say hello, and thank people for joining today’s meeting. Best practice is to wait a few minutes for everyone to arrive.
- Outline the Agenda: Your meeting agenda is crucial, so make sure you go through it at the start.
- Encourage Participation: Tell people to use the chat for questions or raise their hand if they'd like to speak. Try to keep some time back for a Q&A too.
- Start the Meeting: Begin the discussion by focusing on key points, ensuring that everyone stays on topic and within the allocated time.
Wrapping Up the Zoom Meeting
As you near the end of the meeting:
- Summarize: Recap key points and assign action items. This ensures that participants leave with a clear understanding of what was discussed and what the next steps are. Because you are using Bubbles in your meeting, you don't need to go into loads of detail when covering the action items, as this will be automated.
- Record the Follow-Up: If you recorded the meeting with Bubbles, mention that each participant will recieve the recording and notes afterward.
- End the Meeting: Thank everyone for their time and click “End Meeting for All”.
Final Thoughts
Hosting a Zoom meeting is simple once you’ve familiarized yourself with the platform and its features. By using tools like Bubbles Notetaker to automate recordings and transcriptions, and following best practices for managing participants and staying on track, you can be confident that your Zoom meetings will always be efficient, productive, and engaging. Good luck!
Collaborate better with your team
Get your point across using screen, video, and audio messages. Bubbles is free, and offers unlimited recordings with a click of a button.
.avif)


Collaborate better with your team
Get your point across using screen, video, and audio messages. Bubbles is free, and offers unlimited recordings with a click of a button.

.avif)