How to Record a Zoom Meeting: Full Visual Guide
Zoom meetings have become a staple in collaborative work environments. Although they may lack some interactivity compared to in-person meetings, they offer a massive opportunity for retaining information, but only if you record these discussions well! Learn how to here.
Virtual meetings with audio and video conferencing software like Zoom have become an everyday practice for millions around the world in recent years.
However, capturing every detail during these geographically far-fetched, remote virtual meetings can be challenging. We have all felt ourselves become distracted and miss information, and this is natural - after all, most of us are still getting acclimated to this new working set-up. But, this doesn't cover our backs when it comes to overlooking key information. This is where a Zoom recording feature or tool can save our bacon, as they allow participants to record Zoom meetings to then revisit later and get a grasp on those missed elements. Naturally, this recording can also be invaluable for those teammates who weren't able to join the Zoom call.
As briefly alluded to, recording a Zoom meeting has not always been the most straightforward task, and this remains true, but more in a sense that we are spoilt for choice for ways to record, and the challenge therefore lies in finding and choosing the best way to record Zoom, for your own personal preference. This is why I have prepared this guide, and with it, I hope to enlighten you on your best options.
Can you Record Zoom Meetings on Zoom?
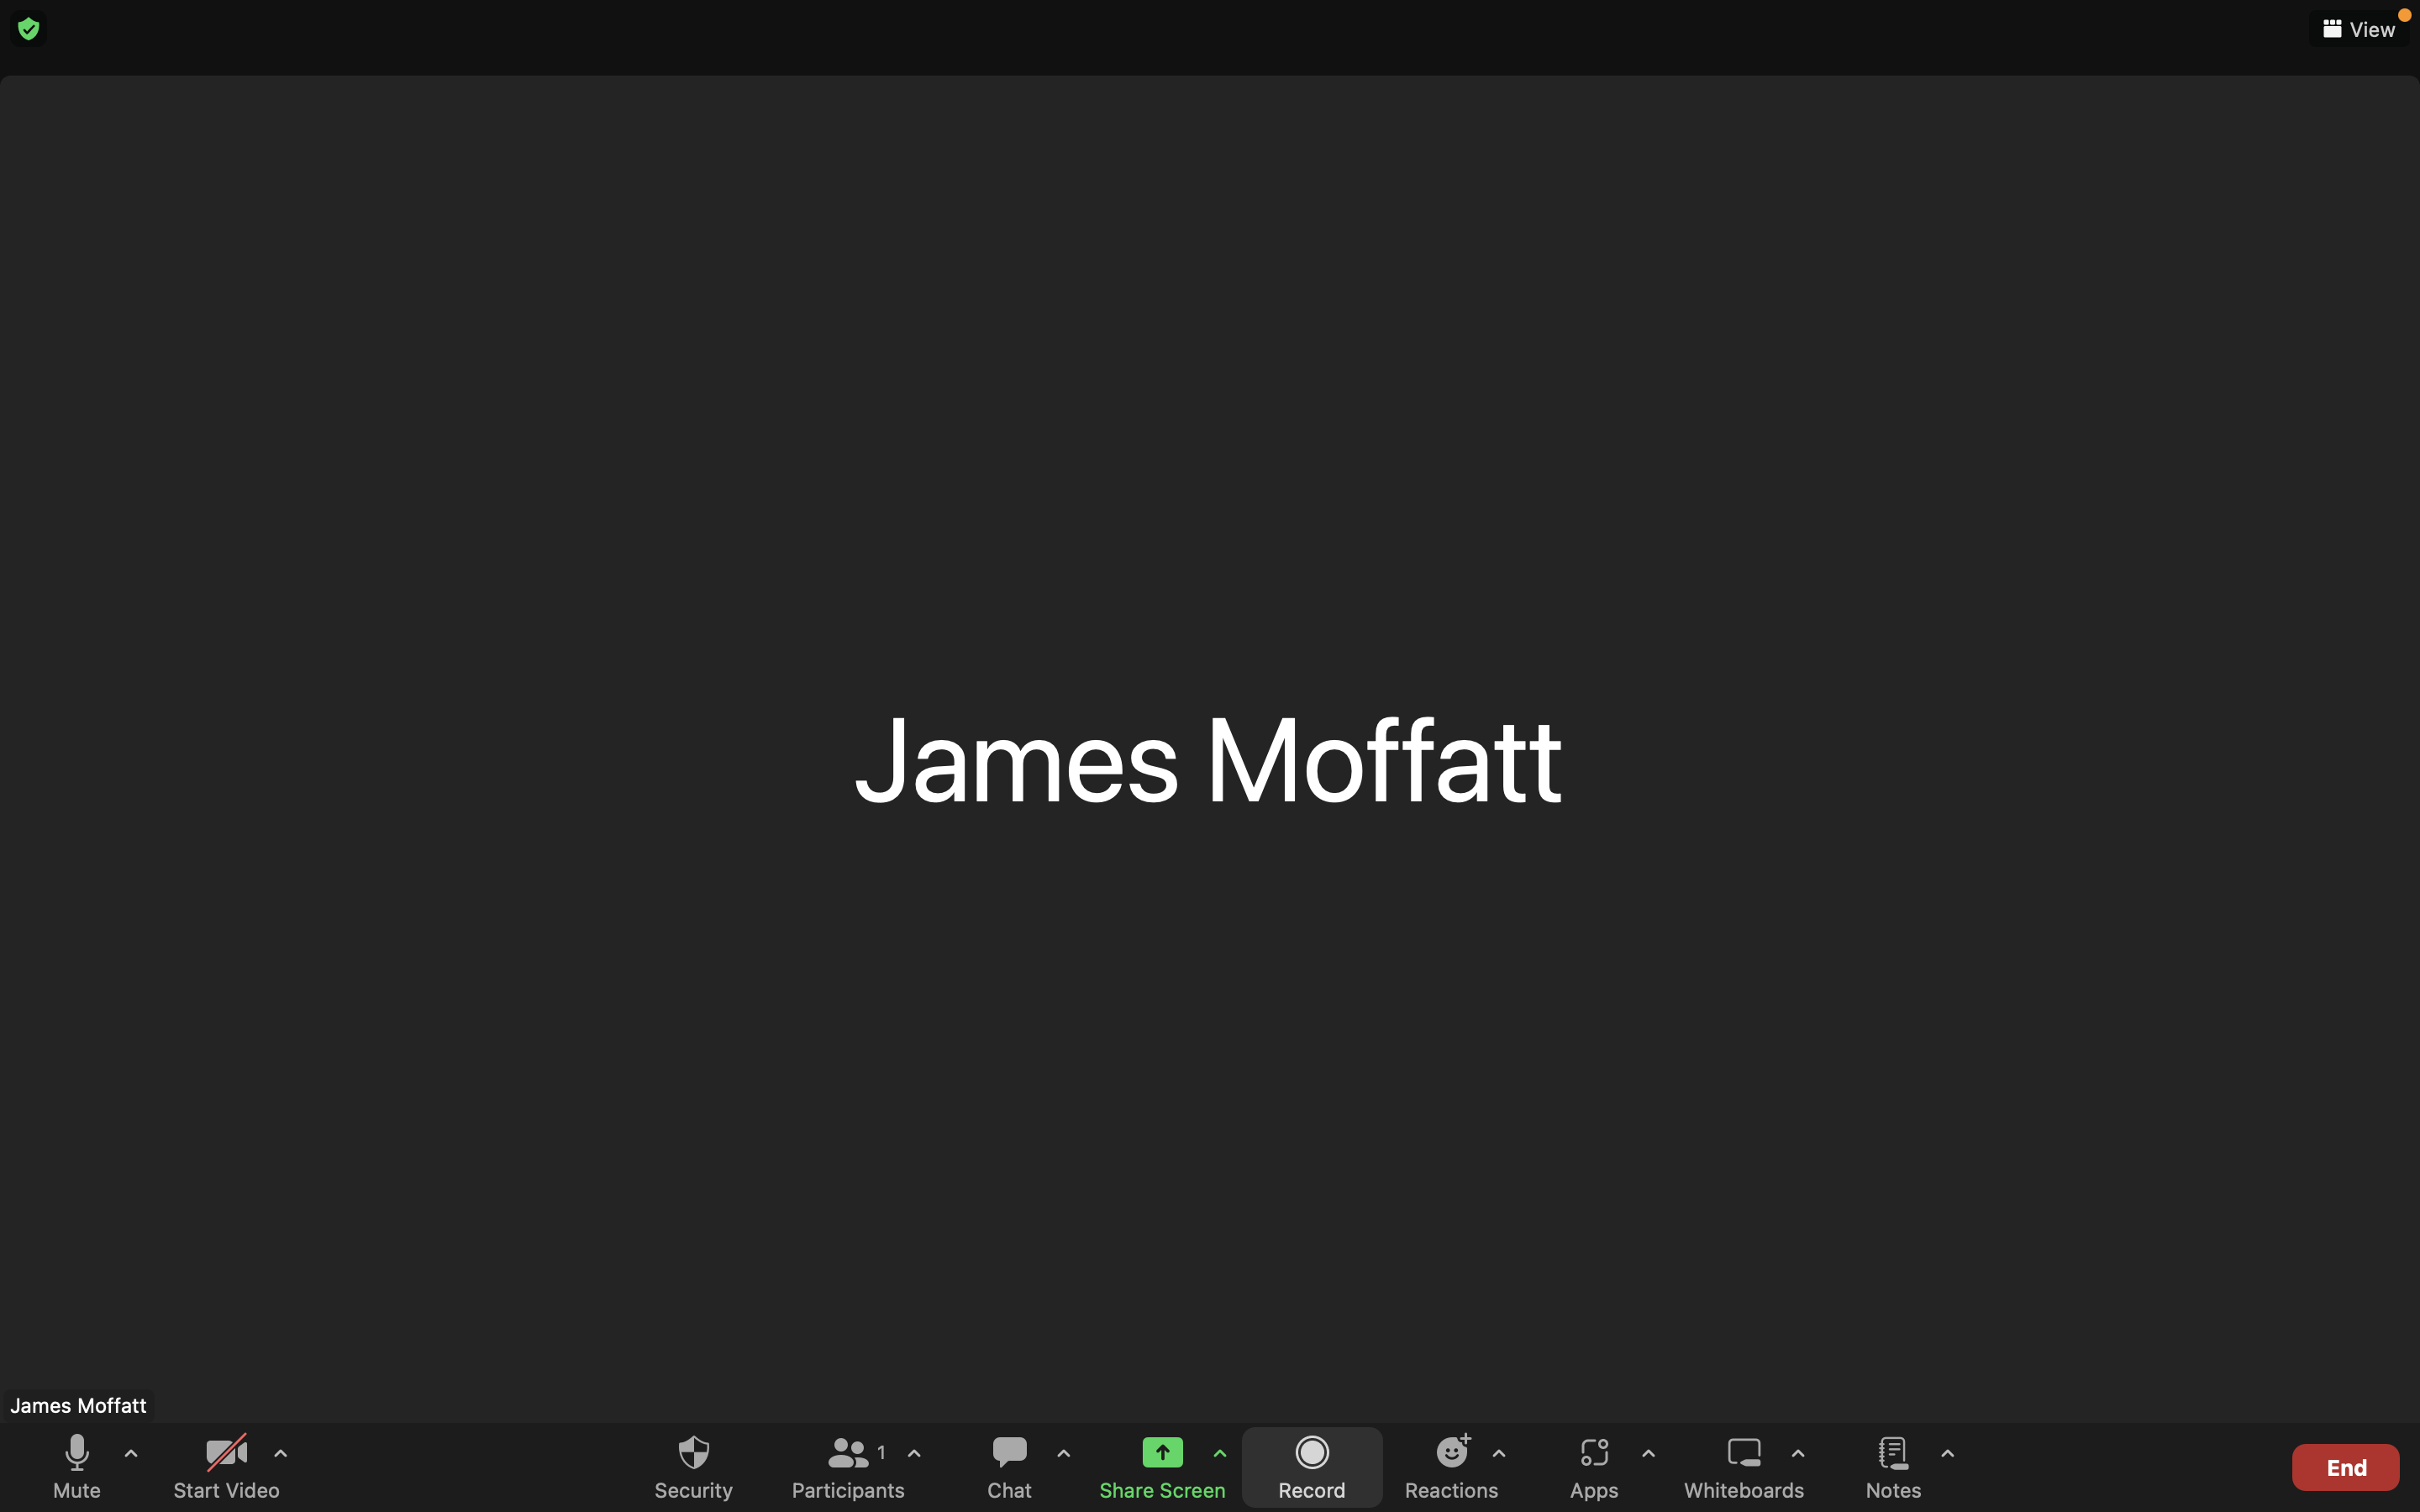
The short answer is that yes, you can. Zoom have a built-in screen recording feature that is easily accessible to you, but only if you are the host of the meeting. The feature can be found in the bottom menu of the Zoom app, as shown below. This feature is something that both free and paid users are able to make the most of, so let's go through the steps together now.
- Open your Zoom app and start hosting a new meeting.
- As illustrated in the image below, click the Record icon on your bottom menu to start your Zoom meeting recording. This is where we see our first difference for free and paid users. As a free user, your Zoom recording will save automatically to your local folder, but as a paid Zoom user, you will have the choice between recording on the device that you are joining the meeting from, or to the Cloud.
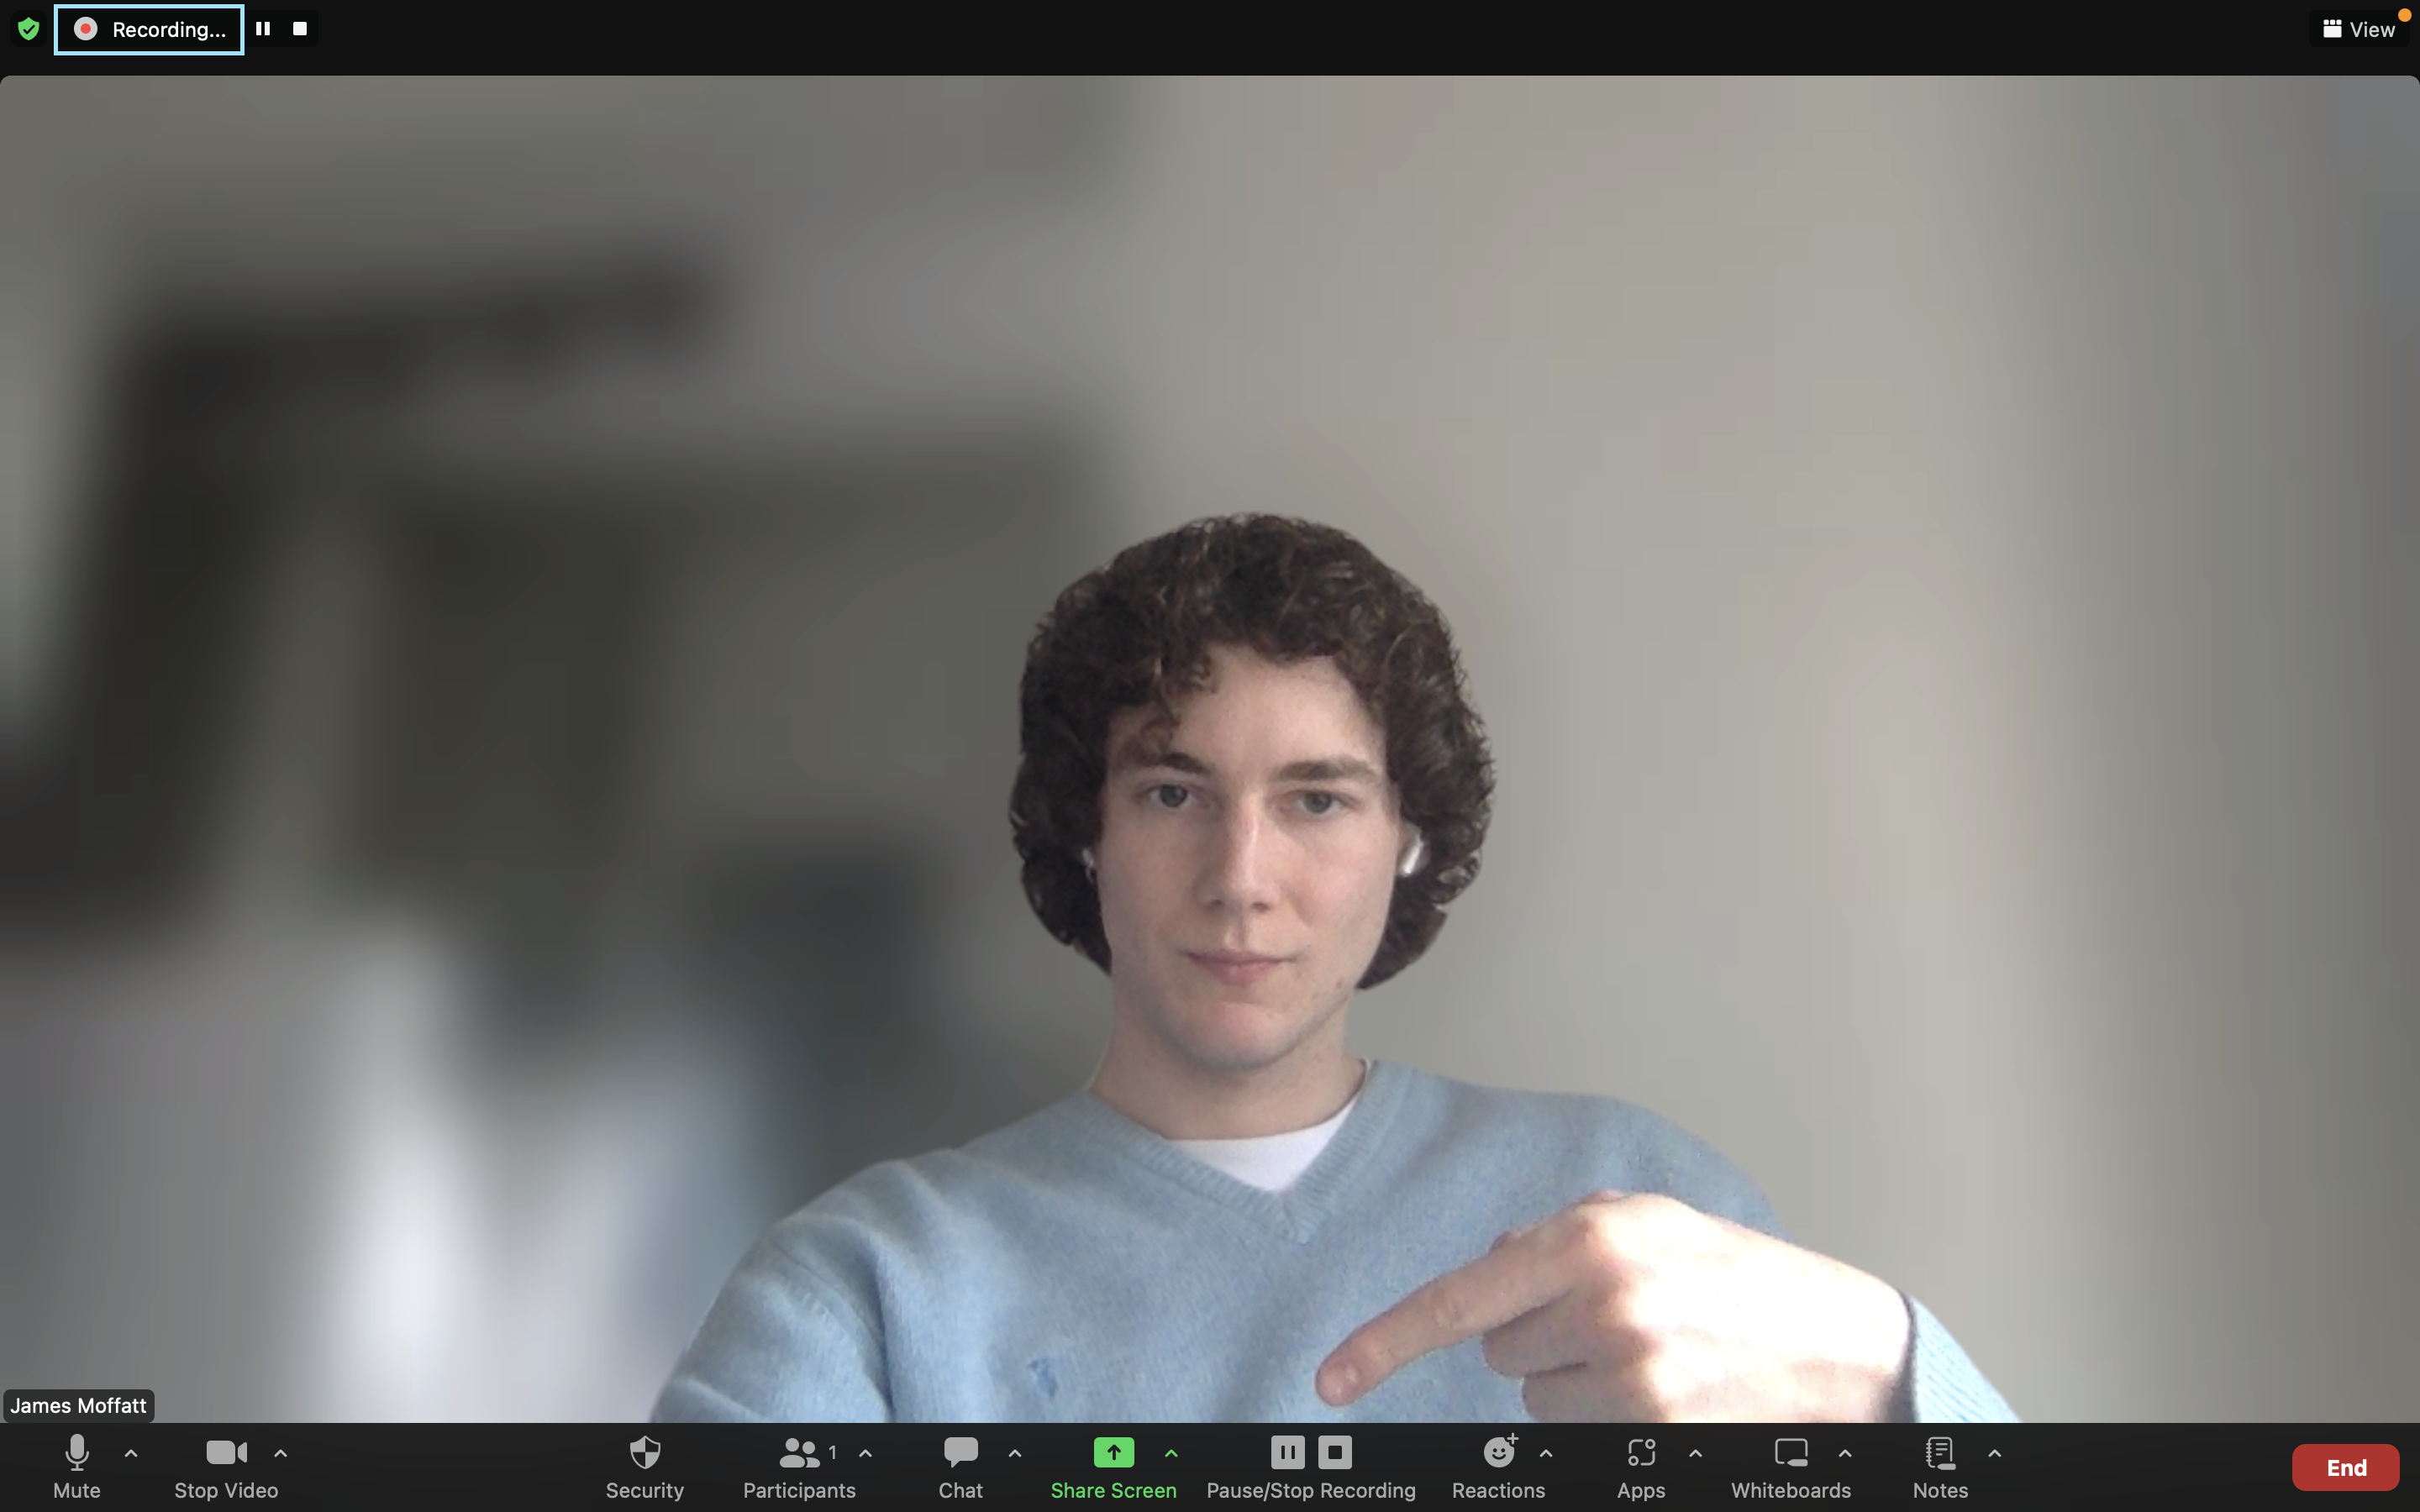
- The recording software is now in action, and as an indication, your Zoom app screen will appear like I have shown below. There is an opportunity to halt the meeting recording temporarily or entirely, with the 'Pause' and 'Stop' Recording icons on the bottom menu, as pointed out (literally) by myself. As you can also see, there is another 'Recording' icon, now in the top left, to indicate that you are on air.
Once you stop the recording, Zoom converts your recording to make the files accessible to you, and as I say, the accessibility depends on the Zoom plan you are subscribed to. Audiovisual recordings will be saved in an MP4 format video folder, whereas audio-only Zoom meetings are saved as M4A format audio folders.
These often unnecessarily large files are where we encounter our next issue with recording Zoom on Zoom, with the first being that you are unable to record through Zoom as solely a participant of the meeting, without requesting permission from the host. I will give you the steps of doing this now, but I will then recommend a less long-winded, more autonomous way for you to record Zoom meetings for yourself.
How to Record Zoom Meetings as a Participant
During your Zoom call, ask for permission from the host to record. If they are unaware of how to do so, they must select Participants.
Then, they should hover over your name and click the More icon, which is represented by three small horizontal dots alongside each other, and beside your name.
From there, they can select the Allow to Record Local Files option, which should give you as the participant, a prompt that you are now allowed to record.
Something more to note is that the host, in a similar vein, can disable your access to Zoom recordings by clicking a different option in the More area.
As I say, not very autonomous, right? Nobody likes to not be in control of their own opportunities, especially with something that can be so beneficial to your work efficiency. Lucky for you, I have another method that can revolutionize your Zoom meetings and leave the destiny of your collaborative success in your own hands.
Make your
meetings matter
Use AI to record, transcribe, and summarize meetings into actions. Bubbles is your home for after-meeting collaboration.
Method 2: Using a third-party meeting recorder
As we have covered, Zoom allows you to record your meetings, but in my experience, there is a whole lot more to recording Zoom meetings well. Ironically, the method that I am going to suggest to you (Bubbles) offers you more, while being lower effort. Think of it as your Zoom meeting's low-hanging fruit.
So, why do I claim that Bubbles offers more? Well, Bubbles not only joins your meetings automatically once you connect your calendar, it also picks up all of the pieces for you, by recording and listening to the meeting, so that it can not only provide the meeting recording in full, but also provide a quick summary or minutes immediately after the meeting, which is helpful for quick review and action.
Maybe I am wrong for being so adamant here, but I don't think a method that requires you to take the time for rewatching and extracting information (Zoom's own recording method) can compare to having all of this information delivered to you on a silver platter instantaneously, so that you are ready to work on the next steps (Bubbles' Notetaker).
Anyway, the least you should do is give it a go, especially because it is free! Let me show you how by walking you through Bubbles Notetaker, so that you are ready to level-up your next Zoom meeting.
How to Record Zoom Meetings with Bubbles
- Connect your Calendar

To get to this stage, login to Bubbles and click your avatar in the bottom left. Click 'Notetaker settings', then connect your Google or Microsoft Calendar. You'll want to choose your work account or at least an account with upcoming meetings on its calendar. Once you're through this authentication flow, set-up is complete.
- Get Ready for your Zoom Meeting
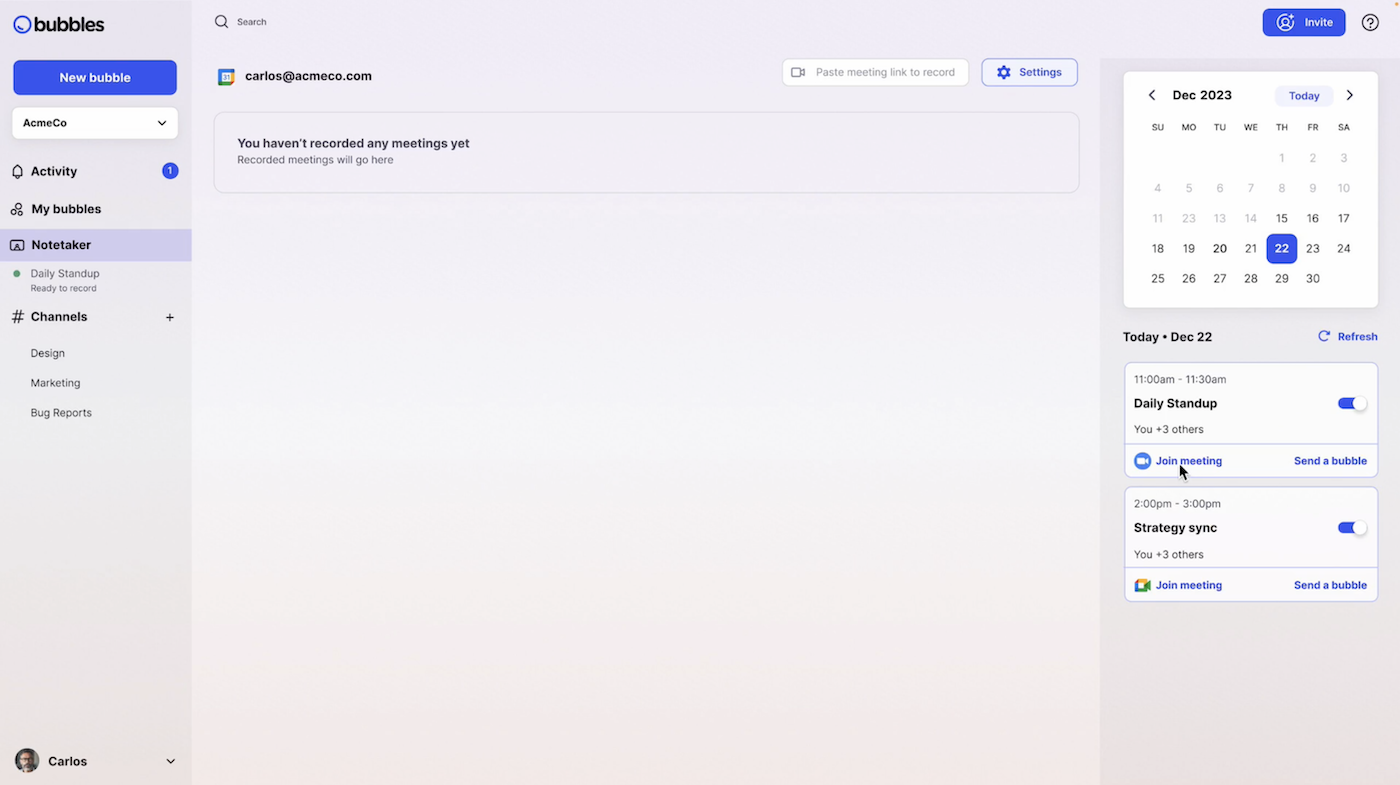
As you can see here on the right, Bubbles Notetaker is now ready to automatically join upcoming meetings on the chosen calendar. Here, the first meeting is a Daily Standup, and as you can also see, there is a toggle that allows you to disable the Notetaker from each specific meeting. You are also able to join your meeting directly through Bubbles by clicking 'Join meeting'.
- Join your Zoom Meeting alongside your Notetaker
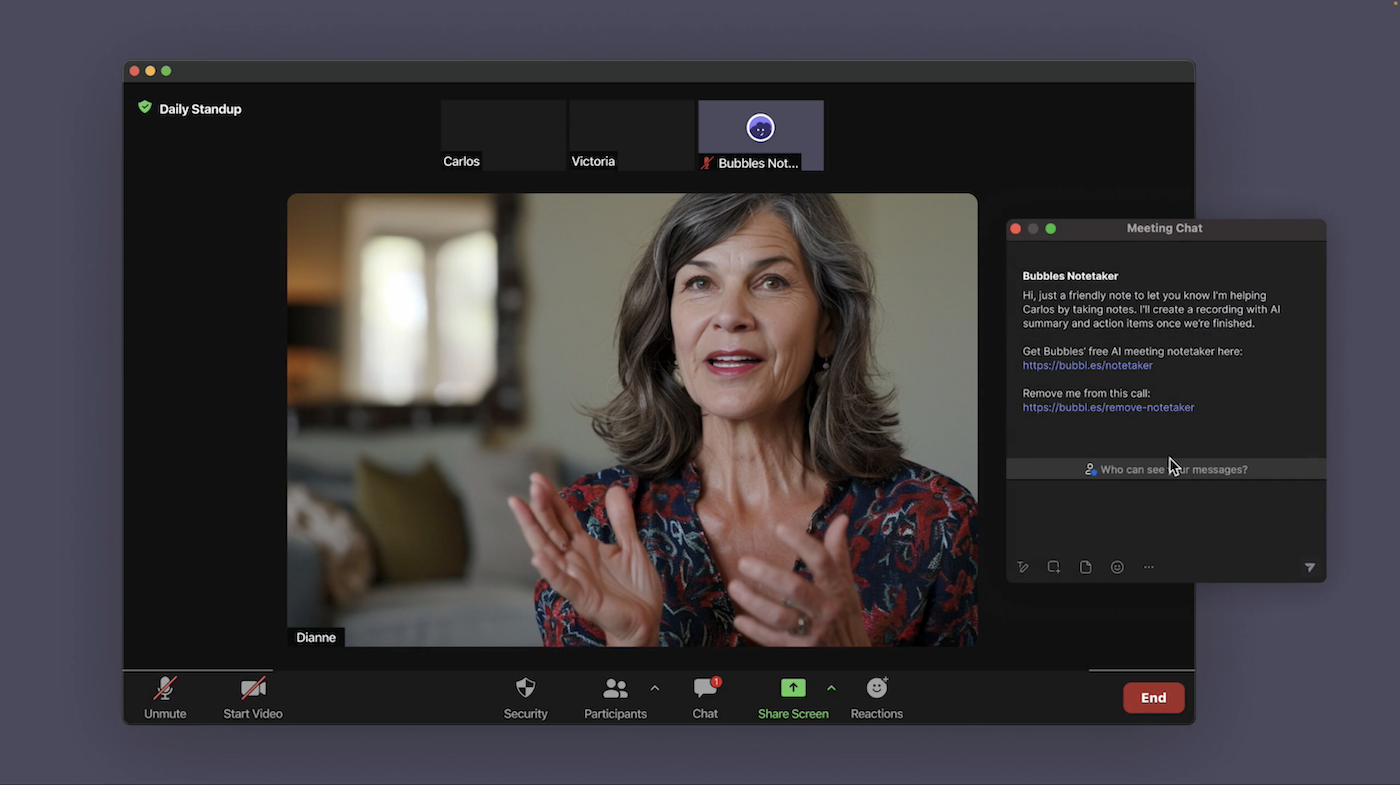
When meeting time arrives and you join the discussion on Zoom, you'll see the Notetaker already in the meeting. As illustrated here, it will send a friendly message and chat letting everyone know who it is and why it's there. From personal experience, I find that a lot of the time, at this step, there is a great level of interest from other attendees of the meeting about what Bubbles is and what it is here to do. Once I tell them, they mostly always want in! There's your added perk of Bubbles: becoming your team's pioneer in new, useful technology.
- View your Zoom Meeting Recording
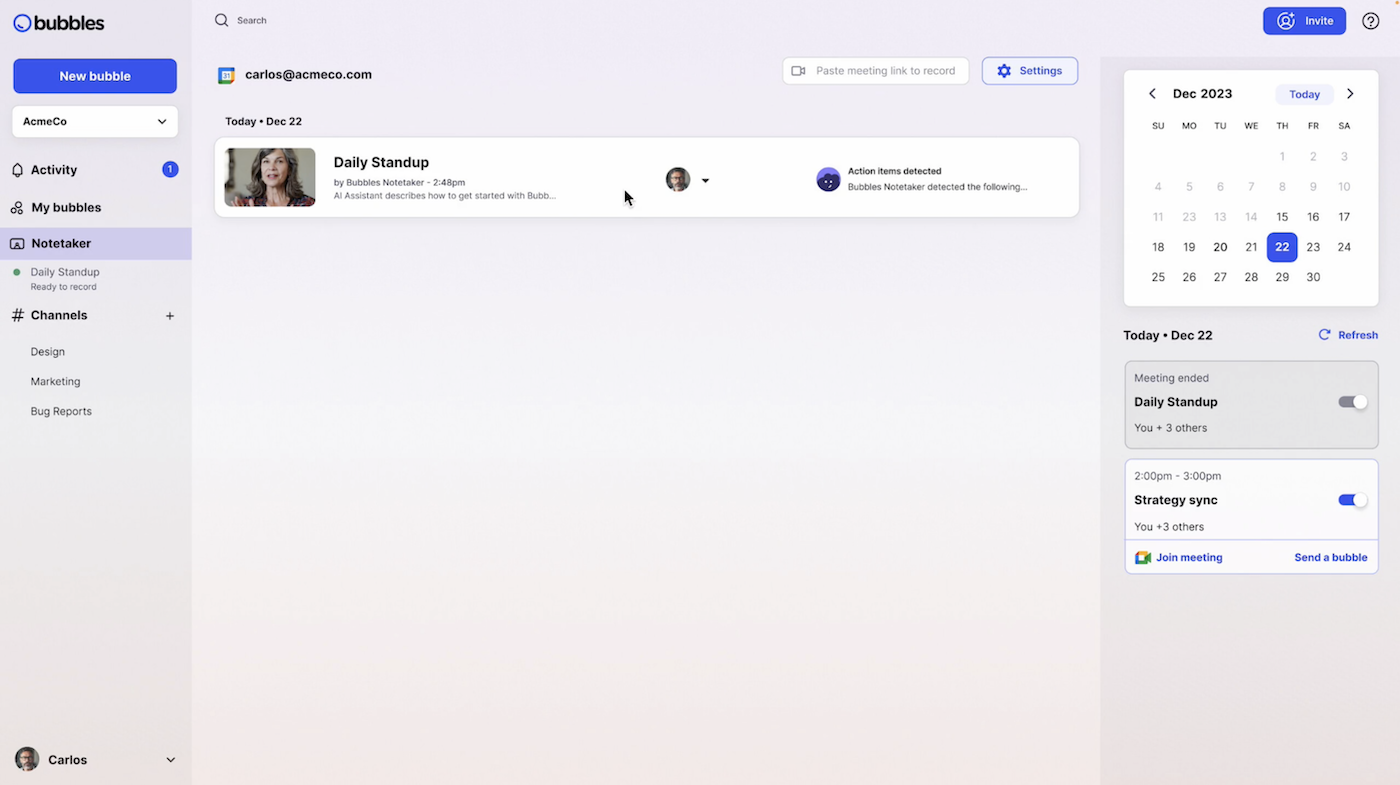
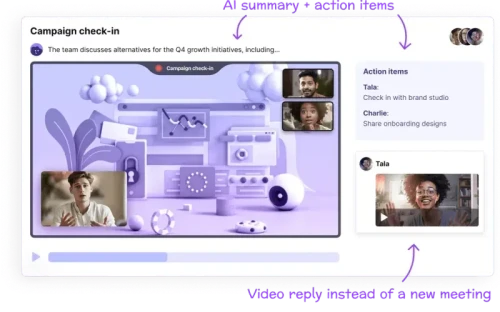
After the call, your Notetaker will send each meeting participant an invitation to a bubble via email. The bubble contains a video recording, transcript, and a wonderfully accurate AI summary and action items, and will also be found in your Notetaker tab within Bubbles, as we see here. Go ahead and click this to begin collaborating asynchronously with everyone involved.
- Happy Collaborating

You have now arrived at your Zoom meeting recording via Bubbles Notetaker. As mentioned, you have your full meeting recording and transcript here, alongside the meeting summary at the top, and action items for each participant. You can leave a comment in the bubble to follow up, or tag in participants who couldn't make this meeting, so that they don't fall behind. After all, you need every team member to be up to date and have a full understanding of the current state of affairs to become a really successful team; Bubbles speeds this process up for you.
So, here you have your guide on Zoom meeting recording. There are many useful ways of recording your Zoom meetings, and I hope that after reading this, you feel more clued up on your preferred style.
As I have stated, my preference is using Bubbles Notetaker for my meetings, and after this walkthrough, I'm sure we are now on the same page regarding its utility. This is before I have even told you that aside from using Bubbles with your Zoom application, the Notetaker also works with Slack, Zoom, Google Hangouts, and Microsoft Teams. You are also able to embed recordings in your Notion pages (and with 200+ other integrations). It is your Swiss army knife when it comes to virtual meetings.
Overall then, I hope you go away from this with the desire to stay ahead of the game and turn collaboration into a fun exercise of efficiency. Good luck!
Collaborate better with your team
Get your point across using screen, video, and audio messages. Bubbles is free, and offers unlimited recordings with a click of a button.
More from Bubbles


Collaborate better with your team
Get your point across using screen, video, and audio messages. Bubbles is free, and offers unlimited recordings with a click of a button.
Make your
meetings matter
Use AI to record, transcribe, and summarize meetings into actions. Bubbles is your home for after-meeting collaboration.